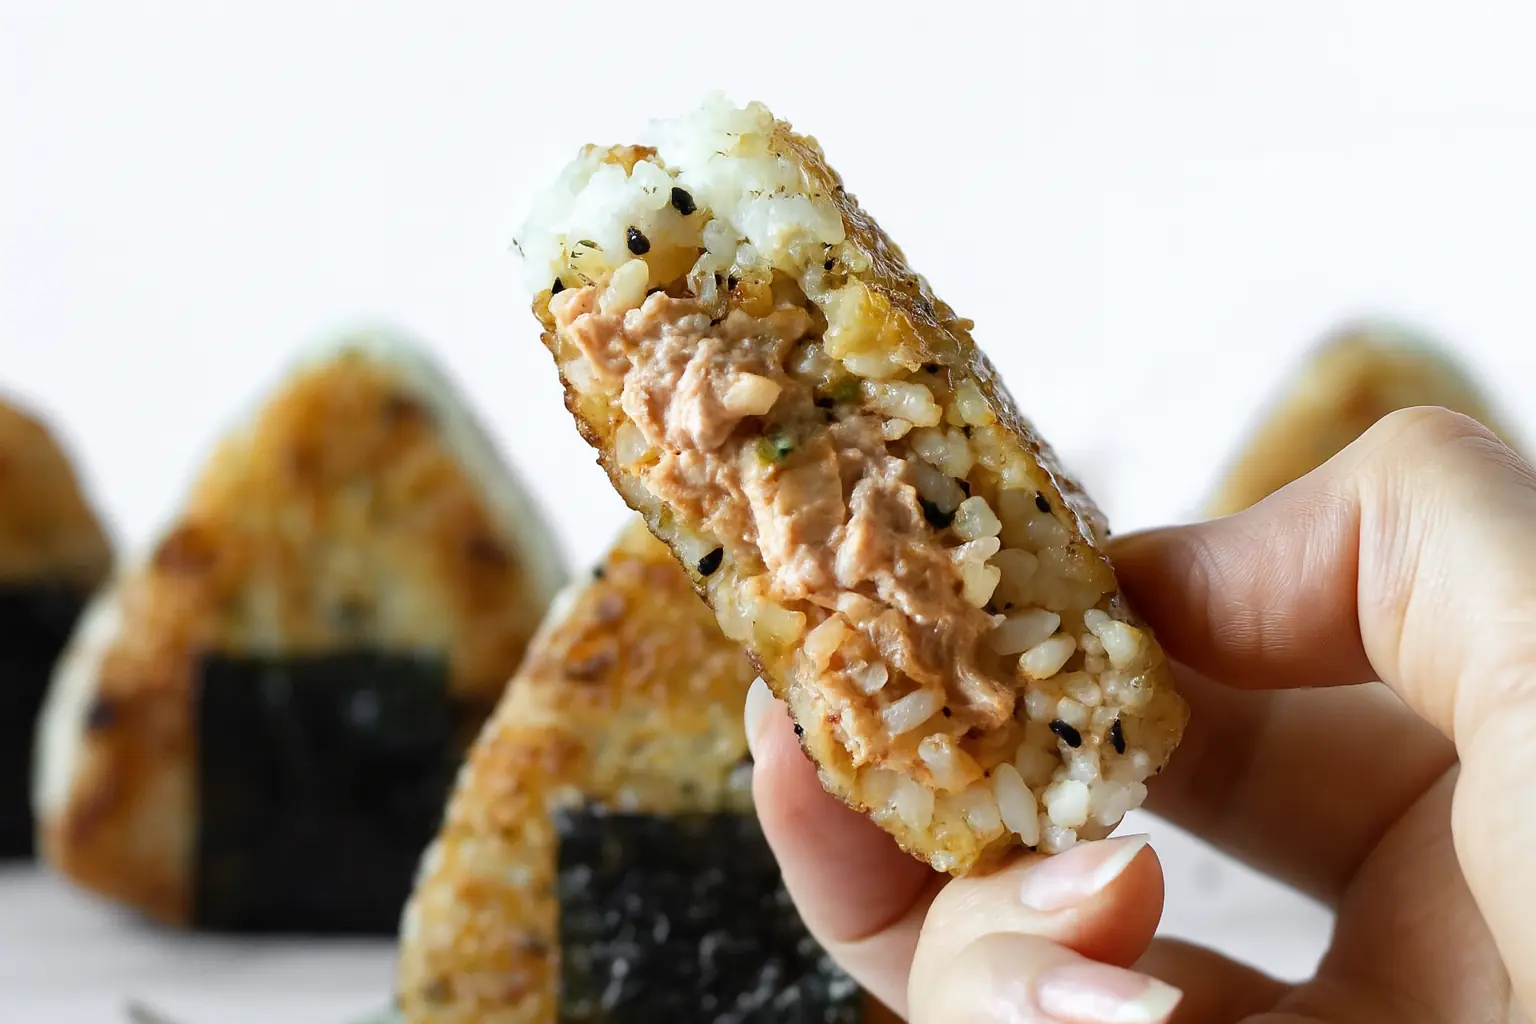
Spicy Tuna Yaki Onigiri with Kimchi brings together the best of Korean and Japanese comfort food. Crispy on the outside, creamy and spicy on the inside, these grilled rice triangles are perfect for lunchboxes or cozy snacks at home. In this article, you’ll learn how to make them step-by-step—from shaping the rice to achieving that perfect golden crust. We’ll also go into the origins of yaki onigiri, what makes spicy tuna filling so special, and how to avoid common mistakes like crumbling rice or soggy texture. Whether you’re a beginner or seasoned home cook, this recipe is a must-try.
The Crispy Story Behind Spicy Tuna Yaki Onigiri with Kimchi
What makes yaki onigiri different from regular rice balls
I still remember the first time I pan-fried my rice ball out of sheer impatience—no grill, no plan, just a hot pan and leftover sushi rice. What happened next changed everything. That golden-brown crust formed so quickly, locking in the sticky rice while giving it a crackling texture I didn’t know I was missing. That’s the magic of yaki onigiri, and when you stuff it with spicy tuna and kimchi, it transforms into something unforgettable.
Regular onigiri are usually soft and served cold or at room temperature. They’re made for convenience, wrapped in nori, and filled with mild ingredients like salted salmon or pickled plum. Yaki onigiri, on the other hand, are grilled or pan-fried, often brushed with a soy sauce mixture. The goal? Crunchy edges and a warm center. It’s a total texture upgrade.
Why kimchi and tuna are a flavor bomb combo
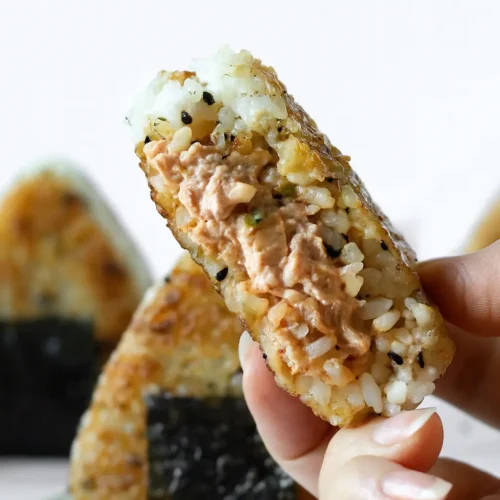
Now, let’s talk about the filling. Tuna mayo has long been a staple in Japanese onigiri, but adding kimchi and gochujang (Korean red pepper paste) brings a fiery depth and a hint of funk. The kimchi adds tang and crunch while Kewpie mayo keeps everything rich and cohesive. Stir in a little sesame oil, and you’ve got a spicy, savory filling that complements the toasty rice shell beautifully.
This combo isn’t just tasty—it’s practical. Canned tuna is pantry-friendly, and kimchi lasts ages in the fridge. When your ingredients work that hard and taste that good, it’s no wonder this dish is becoming a global favorite.
Spicy Tuna Yaki Onigiri with Kimchi
Ingredients
- rice
- ▢4 rice cooker cups uncooked sushi rice | equals 600g / 1.3 lb uncooked sushi rice Note 1
- ▢6 tbsp furikake
- ▢4 tbsp soy sauce
- ▢2 tbsp mirin
- ▢cooking oil
- ▢nori sheets cut into thin strips | optional
- spicy tuna
- ▢150 g canned tuna in water or oil, drained | equals 1 can of tuna
- ▢80 g kewpie mayo
- ▢1 tsp gochujang | Korean red pepper paste
- ▢80 g kimchi chopped (here is my kimchi recipe)
- ▢1 tsp sesame oil
Instructions
- Prepare the rice – Be careful not to overcook the rice. For more details on how to cook the perfect rice, check my guide here. Allow the rice to cool a little before shaping the yaki onigiri.
- In a bowl, mix together the cooked rice and the furikake. Set aside.
- Prepare the tuna – In another bowl, combine tuna, kewpie mayo, gochujang, kimchi and sesame oil. Mix well.
- Shape the yaki onigiri – Wet your hands before shaping the onigiri, or alternatively wear some gloves so that the rice doesn’t stick (Note 2).
- Using an onigiri mould, place some rice at the bottom of the mould, add the tuna filling in the centre (Note 3) and top it with more rice (be sure to add some rice on the sides to prevent the filling from slipping away). Press it down firmly to shape the onigiri. If you don’t have a mould, you can shape it by hand. Start by shaping a large rice ball, flattening it a little, and making a hole in the middle. Add the filling, then close the ball and shape it into a triangle with soft edges.
- Repeat for all onigiri.
- Pan-fry the onigiri – In a small bowl, mix soy sauce and mirin.
- Heat a large pan over medium heat and add a generous amount of cooking oil to prevent the rice from sticking or burning. Add the onigiri to the pan and fry for 2-3 minutes on each side or until golden brown and crispy (Note 4).
- Turn the heat on low and lightly brush the top of the onigiri with the soy sauce mixture. Turn it around and cook for 1 minute. Repeat on the other side.
- Garnish (optional) – to wrap the nori strip around the onigiri, place the strip on a flat surface and position the onigiri in the centre. Fold the ends of the nori strip underneath the onigiri and press lightly to seal. The strip should wrap around the bottom half of the onigiri, leaving the top half exposed. If the nori strip doesn’t stick, you can add a small amount of kewpie mayo to both ends to help it adhere.
- Serve hot or cold.
Notes
2. Shape the onigiri while the rice is still slightly warm. Do not place the rice in the refrigerator or shape the onigiri with cold rice. It will be harder to make it stick together.
3. Filling – do not overcrowd the center with filling or the filling may slip away or you may not be able to close the onigiri.
4. Pan-frying – according to the strength of your stove, adjust the heat to prevent the onigiri from turning dark or burnt. Keep an eye on the onigiri as they cook, and adjust the heat as necessary to ensure they cook evenly and don’t become overcooked or charred. Calories: 258kcal | Carbohydrates: 43g | Protein: 7g | Fat: 6g | Saturated Fat: 1g | Polyunsaturated Fat: 3g | Monounsaturated Fat: 1g | Trans Fat: 0.01g | Cholesterol: 7mg | Sodium: 666mg | Potassium: 96mg | Fiber: 2g | Sugar: 2g | Vitamin A: 150IU | Vitamin C: 1mg | Calcium: 14mg | Iron: 1mg
How to Shape and Fry the Perfect Spicy Tuna Yaki Onigiri
Choosing the right rice and seasoning it right
The key to making Spicy Tuna Yaki Onigiri with Kimchi that actually holds together is using the right rice. Skip basmati or jasmine—this isn’t the place for long grain. You’ll need Japanese short-grain sushi rice, which is sticky enough to shape but still has that soft, slightly chewy bite.
Once your rice is cooked (preferably in a rice cooker for consistent texture), let it cool just enough to handle—it should still be slightly warm. Stir in furikake—a dry Japanese seasoning made of seaweed, sesame seeds, and sometimes bonito flakes. Furikake isn’t just for flavor—it helps season the rice from within and gives your onigiri a pop of umami.
Avoid refrigerating the rice before shaping—it becomes too dry and hard to mold. If your hands get sticky while working, wet them slightly or wear kitchen gloves.
Mastering the shape: by hand or with a mold
If you have an onigiri mold, use it. It’ll save you time and give you uniform, Instagram-worthy triangles. Start by adding a layer of rice to the bottom, spoon a small amount of tuna-kimchi filling in the center, and top it off with more rice. Press firmly to seal. Don’t overload the center—too much filling, and the rice won’t close properly.
No mold? You’ve still got this. Scoop out a handful of rice and shape it into a ball. Press your thumb into the middle to form a well, add the filling, then gently close the rice around it. Use both hands to press the shape into a triangle with soft edges.
Getting the shape right is essential—it keeps the filling from leaking during frying and helps the onigiri develop that gorgeous golden crust we’re aiming for. Ready for that pan sizzle?
Pan-Frying for the Ultimate Crunch
How to get that golden crust without burning
Once your Spicy Tuna Yaki Onigiri with Kimchi are shaped, it’s time for the moment of truth—pan-frying. This step takes them from good to unforgettable. Heat a nonstick skillet over medium heat and add a generous amount of cooking oil—don’t skimp here. The oil keeps the rice from sticking and ensures even browning.
Place the onigiri in the pan and let them cook undisturbed for 2–3 minutes per side, or until they’re golden and crispy. If you flip them too early, they’ll break apart. Keep the heat moderate to avoid scorching the rice before it crisps up.
Once both sides are golden, lower the heat and brush them lightly with your soy sauce and mirin mixture. This step adds sweetness, umami, and just the right amount of moisture for that final lacquered finish. Flip again and cook each side for another minute to let the glaze set and caramelize.
Finishing touches that make a difference
Want to go the extra mile? Wrap each onigiri in a thin strip of nori for a handheld snack that’s both tasty and functional. The seaweed adds flavor and makes them easier to hold. If your nori won’t stick, dab the ends with a little Kewpie mayo—a secret trick I learned after too many wrappers falling off.
Let the onigiri cool slightly before serving. That first bite—crisp outside, warm center, spicy-savory filling—is a total game changer. These are delicious warm but hold their shape well cold, making them perfect for lunchboxes or road trips.
Storing, Reheating & Smart Tips for Success
How to keep them crispy later
You’ve made your Spicy Tuna Yaki Onigiri with Kimchi, and now you’re wondering—can I make these ahead? Absolutely. Once they’ve cooled, wrap each one individually in plastic wrap or place them in an airtight container. They’ll stay good in the fridge for up to 3 days. Just know, the outer crust will soften slightly.
Want to re-crisp that golden shell? Heat a nonstick pan over medium and re-fry for a couple minutes per side until they regain their crunch. Avoid the microwave if you want to keep that crispy texture—but if time’s short, wrap one in a damp paper towel and microwave for 30–60 seconds to keep it from drying out.
Freezing works too—wrap tightly, then store in freezer-safe bags for up to 2 months. Thaw in the fridge overnight and reheat in a pan for best results.
Troubleshooting and smart shortcuts
If your onigiri fall apart while cooking, odds are the rice was either too dry or not sticky enough. Always use freshly made short-grain sushi rice—don’t try this with day-old long-grain rice. Also, shape them while the rice is still slightly warm. It sticks better and holds its form.
Using an onigiri mold makes the process easier and neater, but don’t be afraid to shape by hand—imperfection adds charm. Just keep your hands damp and avoid overfilling.
Finally, gochujang adds moderate heat. If you’re spice-sensitive, use less or mix it with extra Kewpie mayo for a milder kick.
This dish might seem simple, but every step—from the rice to the final fry—plays a part in the final texture and flavor. Get it right, and you’ll be hooked like I was on that very first crispy bite.

Frequently Asked Questions (FAQ)
What is the difference between yaki onigiri and regular onigiri?
Regular onigiri are shaped rice balls typically eaten cold and wrapped in seaweed. Yaki onigiri, however, are pan-fried or grilled until crisp on the outside and often brushed with soy sauce or miso for flavor and texture.
Can you use leftover rice for yaki onigiri?
It’s possible, but not ideal. Leftover rice often lacks the stickiness needed for shaping and may crumble while frying. For best results, use freshly cooked short-grain sushi rice that’s slightly warm.
How do you keep onigiri from falling apart while pan-frying?
Ensure your rice is sticky enough and don’t overfill with spicy tuna. Press the rice firmly when shaping, and let the onigiri cook undisturbed in the pan for a few minutes to develop a stable crust before flipping.
What type of tuna and mayo is best for spicy tuna filling?
Canned tuna in oil adds better flavor and richness than water-packed. For the mayo, Kewpie is preferred for its tang and creaminess. If using regular mayo, add a small pinch of salt or a drop of vinegar for balance.
Conclusion
Spicy Tuna Yaki Onigiri with Kimchi might just be your new favorite snack. From the creamy heat of the filling to that golden, crisped shell, every bite is packed with comfort and character. It’s easy to make, fun to shape, and ideal for meals on the go or cozy nights in. The trick is in the details—use the right rice, shape with care, and pan-fry patiently. Whether you’re already a fan of Japanese and Korean cuisine or trying it for the first time, these onigiri deliver flavor and crunch in every bite.