How a Halloween Snack Became a Family Favorite
Halloween Prep with a Sweet-Twisted Snack
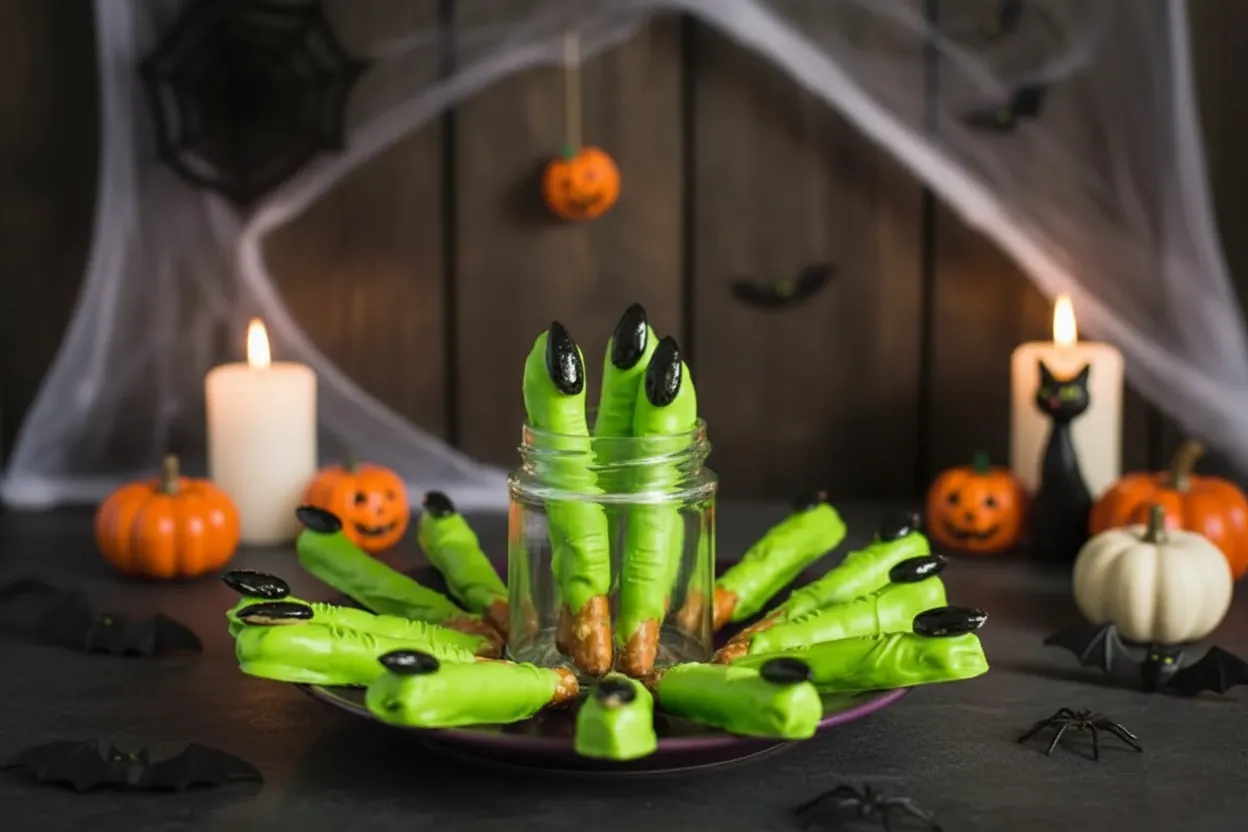
There’s always that one treat at a Halloween party that makes everyone stop and ask, “Wait…what is that?” For us, it was these witch finger pretzel rods—long, gnarled “fingers” with shiny black fingernails and green knuckles, lined up on a tray like they’d just clawed their way out of a haunted house.
The first time I made them was for a neighborhood costume night. I needed something fast, kid-friendly, and fun—but also spooky enough to earn its place among spider cupcakes and bloody punch. These witch finger pretzel rods were a total hit. Kids grabbed them for the shock factor, and adults kept sneaking them when no one was looking.
What makes them so perfect isn’t just their creepy look—it’s the mix of sweet and salty. That crunch of the pretzel, the smooth green candy shell, and that edible black “nail” on top? It’s a weirdly delicious combo that vanishes from the table faster than you can say hocus pocus.
Why Witch Finger Pretzel Rods Are the Star of the Spook Table
These treats check every Halloween box: they’re easy to make, wildly fun to decorate, and surprisingly shelf-stable. You don’t need any fancy baking skills or tools—just pretzels, candy coating, a few almonds, and some black food coloring.
The real magic is in the details: the wrinkled “knuckles,” the glossy almond “nails,” and that eerie green color that screams “witchy mischief.” And because each finger is handmade, no two come out exactly the same—making the whole tray look like a witch’s hand frozen mid-spell.
Ready to make your own batch of finger food? In the next section, I’ll walk you through every step—ingredients, tools, and how to make them look realistic without a cauldron in sight.
Witch Finger Pretzel Rods
Ingredients
- For the Fingernails:
- 28 blanched almonds see note
- 1 tube black gel food coloring
- For the Fingers:
- 14 large pretzel rods
- 12 ounces bright-green candy coating
Instructions
- Make the Fingernails
- Gather the ingredients.
- Use a small food-safe paintbrush to paint the top of each almond with black gel food coloring. (Wear food-safe gloves if you want to avoid getting your fingertips dyed black as well.)
- Set aside on waxed paper or parchment paper to dry while you prepare the rest of the recipe.
- Make the Fingers
- Gather the pretzels. Break or cut each rod in half.
- Place the green candy coating in a small but deep microwave-safe bowl (or heatproof cup) and microwave in 30-second increments, stirring after every 30 seconds to prevent overheating and burning. Stir and heat until the candy coating is completely melted and smooth.
- Holding a pretzel rod by the unbroken end, dip it in the green coating until almost all of it is covered, leaving about a 1/2-inch section undipped at the top where you are holding it.
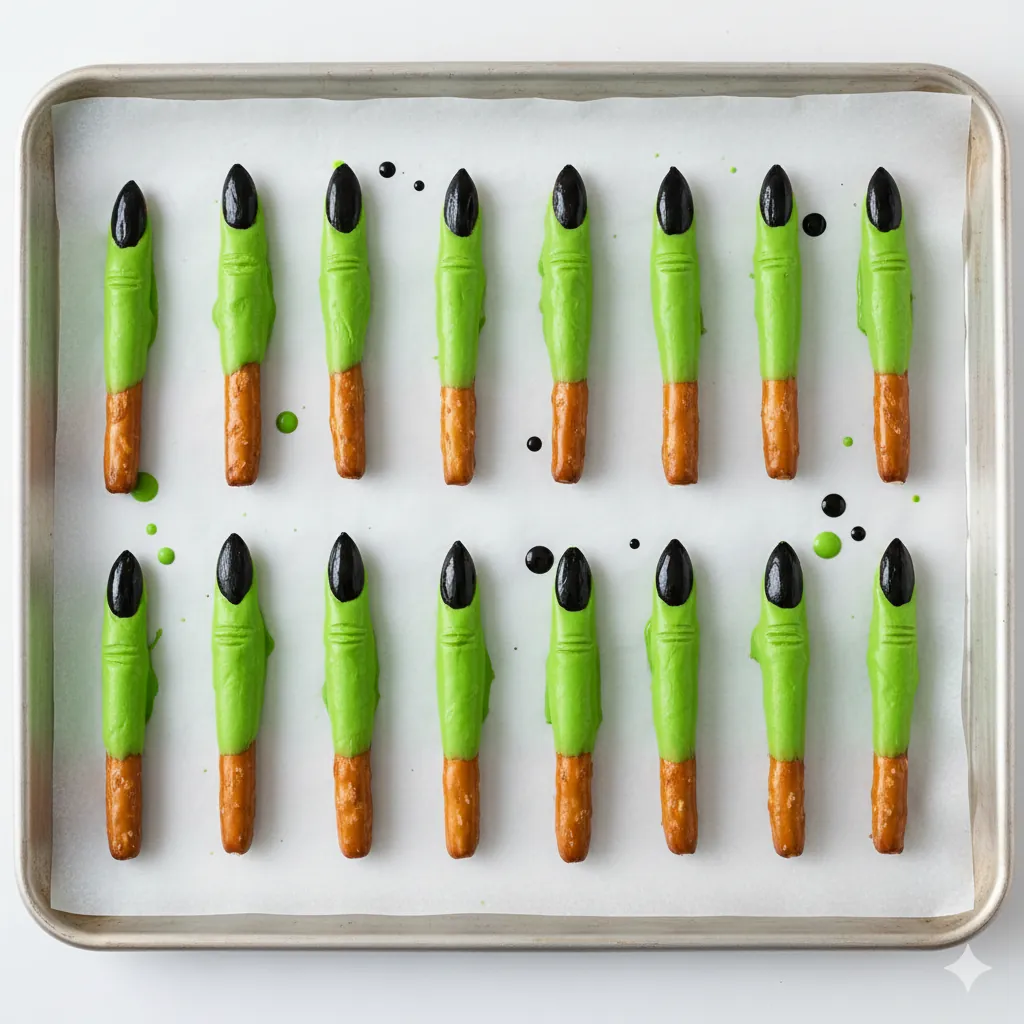
- Place the dipped pretzel on the same lined baking sheet you used to dry the black candy-coated almond nails and immediately press one of them on the tip of the pretzel rod that is coated in green candy coating.
- Add the Details
- Continue to dip more pretzels and, while you do, keep an eye on the already-dipped pretzels. When the coating has started to dry and is mostly matte but not completely hard, it’s time to add the wrinkles for the knuckles.
- Take a toothpick and hold it perpendicular to the pretzels. Gently roll it across the top to add wrinkles. Make two sets—one set near the fingernail, and one set about halfway down the finger. This will make your witch finger super realistic-looking. If the coating is too melted and sticky when you try, give it a few more minutes to set before trying again.
- After all the pretzels have been dipped and decorated, refrigerate the tray for 10 minutes to set the coating completely. After that, the witch fingers can be served on a party tray or be standing up in a mason jar.
Notes
Witches fingers can be stored in an airtight container at room temperature for up to one month.
Recipe Variations
If you don’t want to use almonds painted with food coloring, substituting chocolate-dipped almonds or uncoated almonds is an easy and delicious swap.
And if nuts are an issue, instead of almonds, make the nails out of candy corn dipped in chocolate or painted with black gel food coloring, or use black licorice cut to shape and stick them on with a dab of melted candy coating.
Ingredients, Tools & Step-by-Step Instructions
Everything You’ll Need: From Pretzels to Paint
Making witch finger pretzel rods is easier than it looks—and the list of ingredients is short and budget-friendly. Here’s what you’ll need to create your spooky snack fingers:
For the Fingernails:
- 28 blanched almonds
(Don’t have blanched? See tips at the end to make your own.) - 1 tube black gel food coloring
For the Fingers:
- 14 large pretzel rods
- 12 oz bright-green candy coating
(Look for green candy melts or color white melts with oil-based green food coloring.)
Optional tools:
- Wax paper or parchment
- Food-safe gloves
- A small food-safe paintbrush
- A toothpick (for adding wrinkles)
- Microwave-safe deep bowl or heatproof cup
How to Build the Finger: Dip, Decorate, and Detail
1. Paint the Almond Fingernails
Using a food-safe paintbrush, coat the top of each almond with black gel food coloring. Place them on wax paper to dry. If you’re wearing gloves, even better—black food coloring tends to stick around!
2. Prep the Pretzel Rods
Snap or cut each pretzel rod in half. You’ll have 28 mini rods, each ready to become a finger.
3. Melt the Green Coating
Place the green candy coating in a microwave-safe bowl. Heat in 30-second bursts, stirring after each round. Keep heating until smooth and fully melted.
4. Dip the Pretzels
Hold each pretzel by the broken end and dip it into the green coating, leaving about half an inch uncoated at the top. Place the dipped rod onto wax paper.
5. Add the Fingernails
Quickly press one painted almond onto the green-dipped tip while it’s still wet. It’ll harden in place as it cools.
6. Add Wrinkles
As the green coating begins to set but is still soft (matte, not shiny), use a toothpick to roll in two sets of wrinkle lines—one near the “nail” and one in the middle of the rod.
7. Chill and Set
Place the finished rods in the fridge for 10 minutes to fully set. After that, they’re ready to serve—or stash for later!
Troubleshooting, Twists, and Allergen-Free Options
Avoiding Messy Melts and Candy-Coating Mishaps
Candy coating can be a little temperamental, especially when working with color and texture. Here are a few simple tricks to make your witch finger pretzel rods come out picture-perfect:
- Use a tall, narrow bowl for dipping. This helps coat the pretzel evenly without wasting extra candy melts.
- Don’t overheat the coating. Stir every 30 seconds in the microwave, and stop as soon as it’s smooth. Overheating can cause it to clump or seize.
- Let the pretzels rest on wax or parchment paper—not foil or bare counters—so they don’t stick or smear.
- Add wrinkles at the right time. If the coating is too wet, the lines will disappear. Wait until it’s nearly set but still pliable. Test one first.
And if your candy coating hardens before you’re done? No stress. Just microwave it again briefly and stir well before continuing.
Creative Alternatives: No Nuts? No Problem
Whether you’re serving kids with allergies or just want to try something different, there are plenty of ways to replace the almond “nails” without losing that eerie look.
Nut-Free Nail Alternatives:
- Candy corn: Dip the white tip in black food coloring or melted chocolate and press into the green tip.
- Black licorice: Cut into triangle shapes to resemble long nails. Use a dab of melted candy to “glue” them on.
- Chocolate chips: Turn them point-up to mimic sharp witch claws.
- Mini chocolate bars or chocolate-covered sunflower seeds: Easy to find and allergy-friendly.
Want a flavor twist?
- Try cinnamon candy melts or mint green coating for a flavor surprise.
- Add red gel frosting where the almond meets the “skin” for a gory twist.
The goal is spooky and fun—not perfection. No matter what swaps you choose, the end result will still scream Halloween.
Serving, Storing, and Displaying Your Witch Fingers
How to Store Them (So They Don’t Go Soft or Snap)
One of the best things about witch finger pretzel rods—aside from their spooky look—is how well they hold up. If made properly, you can prep these well before your Halloween party without losing that satisfying crunch.
Storage Tips:
- Let all pretzel rods cool completely before storing.
- Place them in a single layer in an airtight container. If stacking is necessary, separate layers with wax paper to avoid smudging the decoration.
- Store at room temperature, away from moisture and heat. Humidity will soften the pretzels and ruin the candy coating.
- Properly stored, they’ll last for up to one month—perfect for party planning ahead of time.
Avoid Refrigeration (after setting):
Once the candy coating has hardened in the fridge during the initial set, don’t continue storing them cold. Pretzels can absorb moisture and lose their snap. Room temperature is best unless your house is overly warm.
Fun Ways to Present Them for Maximum Halloween Vibes
These eerie snacks deserve a fun spotlight on your table. Here are a few display ideas to get creative with your presentation:
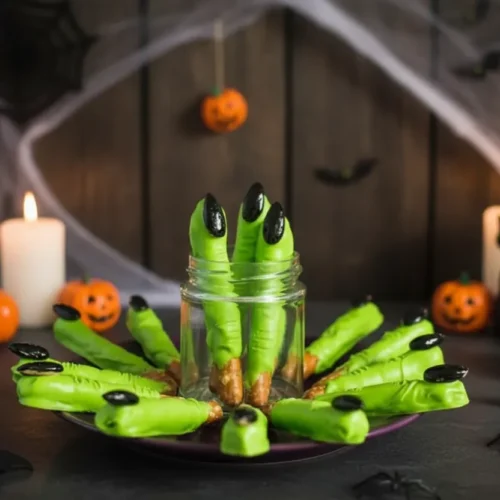
- Mason Jar “Hands”: Place the pretzel rods upright in a mason jar or cauldron so they look like witch fingers reaching up. Add shredded paper or green cotton candy as stuffing for a fuller look.
- Chopped Fingers Tray: Lay them flat on a platter with red gel frosting under each “nail” for a gruesome chopped-off look.
- Creepy Candy Board: Mix your pretzel fingers with gummy worms, eyeball candies, and chocolate skulls on a black slate or wooden board for a spooky charcuterie effect.
- Standing Spellbook Display: Line up pretzel fingers on an open book or parchment scroll with fake spiderwebs and glitter to create a “witch’s recipe reveal” theme.
Whether served flat or standing tall, your witch finger pretzel rods will be the treat everyone remembers. They’re a perfect mix of creepy, crunchy, and sweet—and they set the scene for Halloween fun.
Frequently Asked Questions
What are witch finger pretzel rods made of?
Witch finger pretzel rods are made by dipping pretzel sticks in bright green candy coating and topping each one with a black-colored almond “fingernail.” Wrinkle lines are added with a toothpick to give the appearance of knuckles, creating a spooky and delicious Halloween treat.
Can I make witch finger pretzels without nuts?
Absolutely. If you want to skip almonds due to allergies or preference, you can use candy corn, chocolate chips, licorice, or even chocolate-covered candies. Just attach them with a dab of melted candy coating to keep the spooky fingernail effect.
How far in advance can I make witch finger pretzel rods?
You can make these treats up to one month in advance. Store them in an airtight container at room temperature. Avoid humidity, as it can soften the pretzels or make the candy coating sticky.
What’s the best way to get the wrinkles on the pretzel fingers?
Wait until the green candy coating is matte but not completely set—usually a few minutes after dipping. Then, gently roll a toothpick across the surface to create wrinkles near the nail and the middle of the finger. If the coating is too wet, wait a little longer before trying.
Conclusion
These witch finger pretzel rods aren’t just treats—they’re edible Halloween props that bring delight and a little fright. Easy to make, fun to decorate, and perfect for prepping ahead, they offer a sweet-and-salty crunch that both kids and adults love.
Whether you’re planning a haunted classroom party or hosting a full-blown monster mash, these creepy little fingers will steal the show—and maybe a few gasps too.
Keep them simple or dress them up with blood-red gel and creepy displays. However you serve them, just be warned: they’ll disappear faster than you can say double, double, toil and trouble.