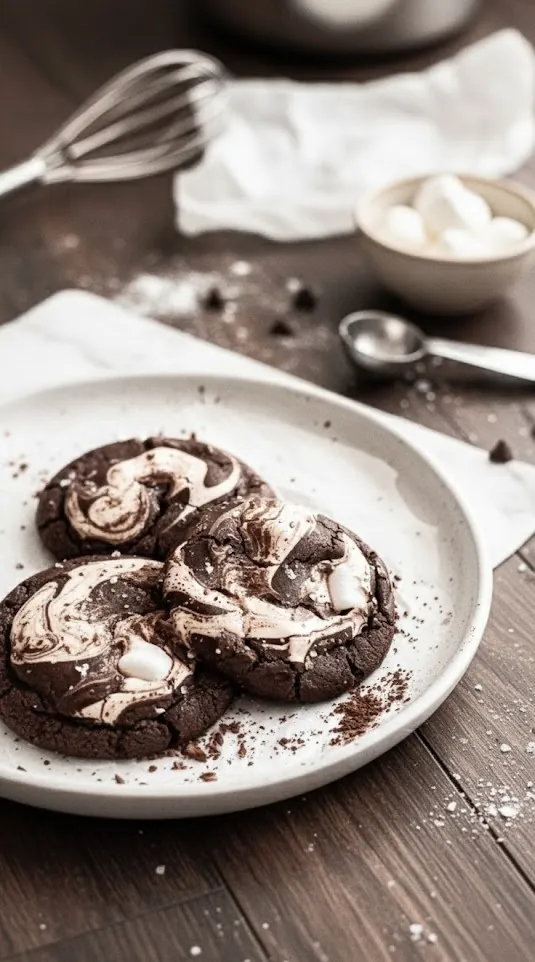
Nothing says Christmas quite like the combination of chocolate and peppermint. These peppermint chocolate chip cookies deliver everything you love about classic chocolate chip cookies but with a festive twist that makes them stand out on any holiday cookie platter. The candy canes add a delightful crunch and a burst of minty freshness that perfectly complements the rich dark chocolate. Additionally, they look stunning with their red and white speckles against the golden-brown cookie dough, making them a show-stopping addition to cookie exchanges and holiday gatherings. The contrast between the sweet chocolate chips and refreshing peppermint creates a flavor profile that’s both nostalgic and exciting, reminding us of candy canes, hot cocoa, and cozy winter evenings. These cookies are versatile enough to serve at formal holiday parties or casual family get-togethers, and they photograph beautifully for those who love sharing their baking creations on social media. The festive appearance combined with the crowd-pleasing flavor makes peppermint chocolate chip cookies an instant hit with both kids and adults alike.
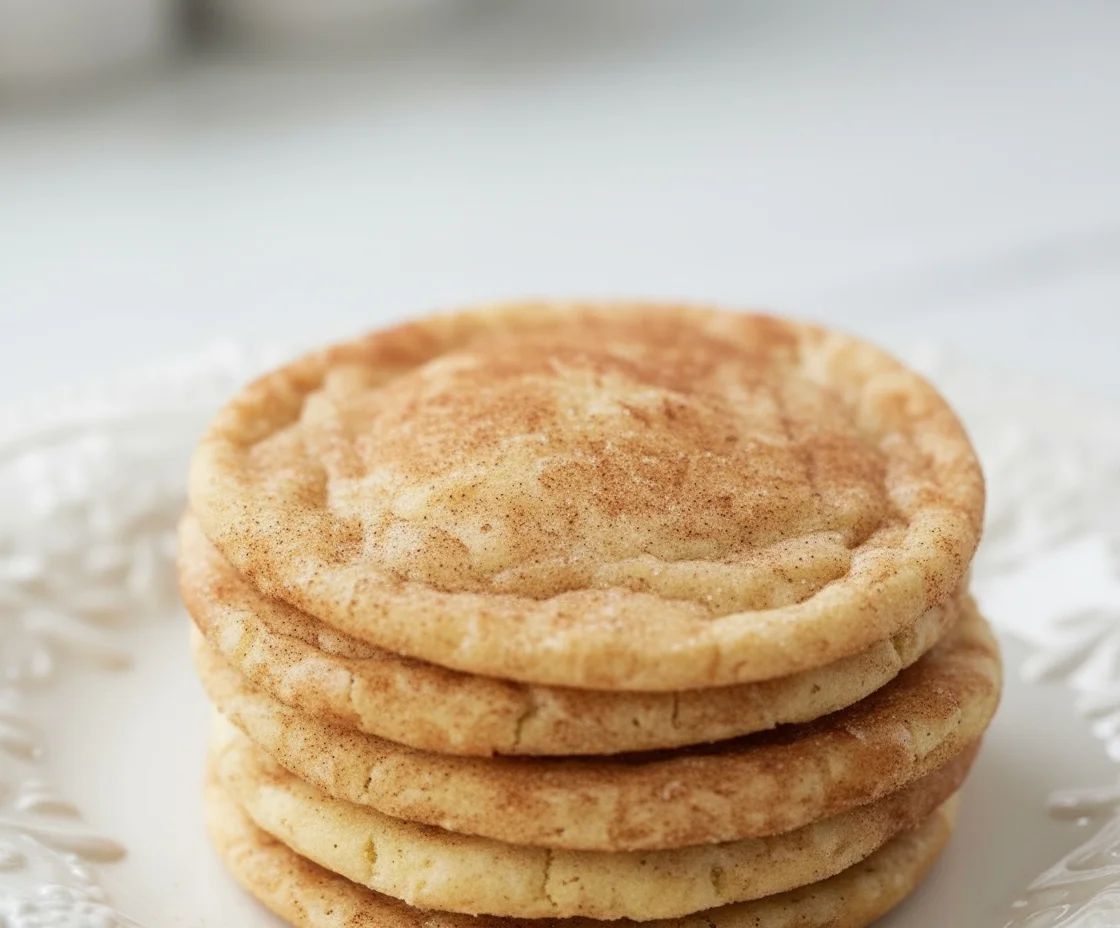
The Secret to Soft and Chewy Texture
The key to achieving that perfect soft and chewy texture lies in the right balance of ingredients and proper technique. Creaming the butter and sugars for at least three minutes creates a light and fluffy base that results in tender cookies with the ideal crumb structure. Using cool room temperature butter—between 64-68°F—prevents the cookies from spreading too much in the oven, which would otherwise result in thin, crispy cookies instead of thick, bakery-style treats. The ratio of light brown sugar to granulated sugar also plays a critical role, as brown sugar contains molasses that keeps cookies moist and chewy while adding a subtle caramel flavor that deepens the overall taste. Avoiding overmixing the dough after adding the flour is equally important, as overworking the gluten creates tough, dense cookies rather than soft ones. The combination of these techniques, along with proper baking time, produces peppermint chocolate chip cookies with crispy edges and soft, gooey centers that stay fresh for days.
Ingredient Selection Matters
Quality ingredients make all the difference in these peppermint chocolate chip cookies. Dark chocolate chips or chopped dark chocolate bars provide a rich, intense chocolate flavor that balances the sweetness of the candy canes without being overwhelming. The higher cocoa content in dark chocolate adds complexity and prevents the cookies from tasting overly sweet, which can happen when using milk chocolate. Fresh candy canes are essential—old ones can taste stale and won’t provide that crisp peppermint snap that makes these cookies so satisfying to bite into. Furthermore, using fine sea salt instead of table salt brings out the flavors without making the cookies taste salty, and it dissolves more evenly throughout the dough. All-purpose flour measured correctly forms the structure of the cookies, while baking soda provides the lift needed to create that perfect texture. The vanilla extract enhances all the other flavors and adds warmth to the overall taste profile of these peppermint chocolate chip cookies.
Baking Techniques That Make a Difference
Mastering the proper baking techniques separates good peppermint chocolate chip cookies from exceptional ones. The process involves careful attention to detail at every step, from mixing to baking, and these methods are backed by both science and years of testing by professional bakers. Temperature control plays a massive role in cookie success, as does timing—removing cookies from the oven at precisely the right moment determines whether they turn out perfectly chewy or disappointingly dry. Understanding how ingredients interact when exposed to heat helps you troubleshoot problems and adjust recipes to suit your preferences. The techniques you’ll learn here apply not just to peppermint chocolate chip cookies but to virtually any cookie recipe you tackle in the future. Professional bakers use these same methods in commercial kitchens, and they’re surprisingly simple to implement at home with just a bit of practice. Consistency comes from following proven techniques rather than guessing or cutting corners, and the results speak for themselves in every batch.
The Importance of Chilling Cookie Dough
Chilling your cookie dough isn’t just a suggestion—it’s absolutely necessary for the best results. Freezing the cookie dough balls for a minimum of three to four hours (or overnight) yields better flavor development and prevents excessive spreading during baking, resulting in thicker cookies with more concentrated flavors. When dough is chilled, the flour has time to fully hydrate, which creates a better texture and allows the fat to solidify so cookies hold their shape in the oven. Moreover, cold dough hits the hot oven and creates cookies with crispy edges and soft, gooey centers—that perfect contrast that makes peppermint chocolate chip cookies so irresistible. The chilling process also allows the sugar to dissolve more completely into the butter and eggs, which creates a smoother texture and helps develop those beautiful crackly tops. Overnight chilling produces the deepest, most complex flavors as the ingredients continue to meld together in the refrigerator. You can even freeze the dough balls for up to one month, making it easy to bake fresh peppermint chocolate chip cookies whenever cravings strike.
Proper Candy Cane Preparation
Crushing candy canes correctly prevents baking disasters and creates the perfect distribution throughout your cookies. Use a mallet or heavy object to smash candy canes inside a sealed ziplock bag, breaking them into very small pieces rather than large chunks that cause problems during baking. Large pieces of candy cane will melt during baking and pool out of the cookies, creating a sticky mess that sticks to the pan and ruins the cookie bottoms. The pieces should be roughly the size of chocolate chips or smaller to integrate properly into the dough without melting through the cookies. Some bakers recommend coating the crushed candy canes in a small amount of flour before adding them to the dough, which helps them “float” throughout the cookies instead of sinking to the bottom. Check the bottoms of your dough balls before baking and move any large candy cane pieces to the top or cover them with additional dough to prevent sticking. This simple preparation step makes the difference between beautiful peppermint chocolate chip cookies and a frustrating cleanup job.

Peppermint Chocolate Chip Cookies
Ingredients
- 12 tablespoons unsalted butter cool room temperature
- ▢1 cup light brown sugar packed
- ▢1/4 cup granulated sugar
- ▢1 large egg room temperature
- ▢2 teaspoons vanilla extract
- ▢2 1/4 cup all-purpose flour *See notes below for measuring*
- ▢1 teaspoon baking soda
- ▢1 teaspoon fine sea salt
- ▢3/4 cup chopped dark chocolate bar or chocolate chips plus more for topping
- ▢1/4 cup candy canes crushed in small peices, plus more for topping
Instructions
- Cream the butter and sugars. Cream together the butter, light brown sugar, and granulated sugar until light and fluffy, about 3 minutes.
- 12 tablespoons (168 g) unsalted butter,1 cup (200 g) light brown sugar,1/4 cup (50 g) granulated sugar
- Mix in the wet ingredients. Mix in the egg and vanilla extract until just combined. Scrape down the sides of the bowl if needed.
- 1 (50 g) large egg,2 teaspoons vanilla extract
- Mix in the dry ingredients. Mix in the flour, salt, and baking soda until almost combined then fold in the chocolate chips and candy cane pieces until just combined.
- 2 1/4 cup (270 g) all-purpose flour,1 teaspoon fine sea salt,1 teaspoon baking soda,3/4 cup (90 g) chopped dark chocolate bar or chocolate chips,1/4 cup (40 g) candy canes
- Scoop and chill the cookie dough. Scoop the cookie dough into 2 tbsp balls onto a parchment-lined baking sheet. Chill the cookies in the freezer for a minimum of 3-4 hours, or until frozen solid. Overnight will yield the best flavor!
- Preheat the oven. When ready to bake, preheat the oven to 350 F/180 C. Bake the frozen cookies spaced at least 2 inches apart for 9-10 minutes. They will look pale and still underbaked when you pull them out but will continue to bake and firm up while cooling.
- Decorate with extra candies. Press more candy cane pieces and dark chocolate chips to the tops. Then let the tray cool completely on a wire rack before removing and enjoy!
- Store leftover baked cookies in an airtight container at room temperature for 2-3 days. Store the frozen cookie dough balls in an airtight container or ziplock bag for up to 1 month. After this time, the candy canes start to melt and disappear into the cookie dough.
Notes
Use cool room temperature butter: butter should be between 64-68F for best results and to prevent the cookies from overly spreading in the oven! You can stick a thermometer into your stick of butter to gauge if it’s ready.
Smash the candy canes. Use a mallet or hard object to smash the candy canes inside a ziplock bag. Make sure to crush them into very small pieces; large chunks will melt and pool out of the cookies and stick to the pan.
Candies near the edge of the cookies may melt out. If you notice any large chunks of candy cane on the bottom of the cookie dough balls, I suggest covering them with a piece of dough or moving them to the top. This will keep the cookies from sticking to the pan after baking. Nutritional
Serving: 1serving | Calories: 152kcal | Carbohydrates: 20g | Protein: 2g | Fat: 7g | Saturated Fat: 4g | Polyunsaturated Fat: 0.3g | Monounsaturated Fat: 2g | Trans Fat: 0.2g | Cholesterol: 20mg | Sodium: 133mg | Potassium: 54mg | Fiber: 1g | Sugar: 12g | Vitamin A: 167IU | Calcium: 14mg | Iron: 1mg
The calorie information provided for the recipe is an estimate. The accuracy of the calories listed is not guaranteed.
Measuring and Mixing Like a Pro
Accurate measuring and proper mixing techniques are the foundation of successful cookie baking. Many home bakers struggle with inconsistent results because they don’t follow proper measuring protocols, which can throw off the entire recipe. The ratio of wet to dry ingredients must be precise to achieve the right cookie texture, and even small variations can produce dramatically different results. Understanding these fundamentals transforms your baking from hit-or-miss to consistently perfect, giving you confidence every time you make peppermint chocolate chip cookies. Professional bakers swear by these methods because they eliminate guesswork and produce reliable outcomes batch after batch. The mixing order affects how ingredients combine and interact with each other, which directly impacts the final texture and rise of your cookies. Taking the time to measure and mix correctly might add a few extra minutes to your prep, but the difference in quality is worth every second.
The Spoon-Level Method for Flour
Never scoop your measuring cup directly into the flour bag—this is the number one mistake that leads to dry, crumbly cookies that lack the soft, chewy texture everyone loves. Instead, use the spoon-level method: fluff the flour in its container first, then spoon it gently into your measuring cup, and finally level it off with a straight edge like a knife or spatula. This technique prevents packing too much flour into the cup, which would result in tough cookies that are dense rather than tender. Scooping directly from the bag compresses the flour and can add up to 25% more flour than the recipe intends, dramatically altering the cookie’s texture. For the most accurate measurements, use a kitchen scale and measure exactly 270 grams of all-purpose flour for this peppermint chocolate chip cookies recipe. Weighing ingredients eliminates the variability that comes with volume measurements and gives you bakery-quality precision at home. This one change in how you measure flour will improve not just your peppermint chocolate chip cookies but every baked good you make.
Mixing Order and Timing
The order in which you mix ingredients significantly affects your final cookie texture and structure. Start by creaming the butter and sugars together for a full three minutes until the mixture becomes light, fluffy, and noticeably paler in color. This step incorporates air into the dough, which creates a lighter texture and helps the cookies rise properly in the oven. Then add the egg and vanilla, mixing just until combined—overmixing at this stage activates the gluten in the flour and creates tough, chewy cookies in a bad way. Add the dry ingredients (flour, baking soda, and salt) last, mixing only until you no longer see streaks of flour remaining in the dough. Once the dry ingredients are nearly incorporated, stop the mixer and finish mixing by hand to avoid overworking the dough. Finally, fold in the chocolate chips and crushed candy canes gently with a spatula, distributing them evenly throughout the dough without deflating the air you worked so hard to incorporate. Following this exact mixing sequence produces peppermint chocolate chip cookies with the ideal texture every single time.
Baking and Storage Tips for Best Results
Getting the timing and temperature right makes the difference between perfect cookies and disappointing ones. Even with perfect dough preparation, improper baking ruins the final product and wastes all your careful work. Oven temperature accuracy is critical because most home ovens run hot or cold by 25 degrees or more, which dramatically affects baking times and results. These final tips transform your peppermint chocolate chip cookies from good to bakery-quality, giving them that professional appearance and taste that impresses everyone. Storage methods also matter tremendously because cookies can quickly become stale or lose their texture if not stored properly. Learning how to preserve freshness means you can enjoy your peppermint chocolate chip cookies for days after baking, or prepare dough weeks in advance for convenient last-minute baking. The strategies below come from professional pastry chefs who bake thousands of cookies and know exactly what works best.
Oven Temperature and Baking Time
Preheat your oven to 350°F and position your oven rack in the center for even heat distribution around the cookies. Bake frozen cookie dough balls spaced at least two inches apart for nine to ten minutes—they should look pale and slightly underbaked when you remove them from the oven. The cookies continue to bake on the hot pan after removal from the oven, so pulling them out early prevents overbaking and keeps the centers soft and chewy. If you prefer crispier peppermint chocolate chip cookies, add one to two extra minutes of baking time, but watch them carefully to prevent burning. Using an oven thermometer helps verify that your actual oven temperature matches the dial setting, which eliminates one of the most common causes of baking failures. Rotate the baking sheet halfway through if your oven has hot spots that cause uneven browning. The edges should be set and lightly golden while the centers still look soft and puffy when you remove the tray from the oven.
Storage and Make-Ahead Options
Store baked peppermint chocolate chip cookies in an airtight container at room temperature for two to three days to maintain freshness and prevent them from drying out. For longer storage, freeze the unbaked cookie dough balls in an airtight container or ziplock bag for up to one month, which allows you to bake fresh cookies whenever you want them. After one month in the freezer, the candy canes start to melt and disappear into the dough, so don’t exceed this timeframe if you want visible peppermint pieces. Press extra candy cane pieces and chocolate chips onto the tops of warm cookies immediately after removing them from the oven for a bakery-style presentation that looks professionally decorated. Place a slice of bread in the container with stored cookies to keep them soft, as the cookies will absorb moisture from the bread and stay fresh longer. You can also freeze fully baked cookies for up to three months in a freezer-safe container, thawing them at room temperature for about 30 minutes before serving. Making cookie dough in advance and freezing it gives you the flexibility to bake small batches of fresh peppermint chocolate chip cookies throughout the holiday season.

Frequently Asked Questions
Can I use peppermint extract instead of candy canes in these cookies?
You can add 1/2 to 1 teaspoon of peppermint extract to the dough for extra minty flavor, but it won’t replace the visual appeal and textural contrast that crushed candy canes provide. The candy canes give peppermint chocolate chip cookies their festive red and white appearance and create delightful crunchy peppermint bursts throughout each bite. Most bakers recommend using actual crushed candy canes for the authentic holiday cookie experience, though you can combine both extract and candy canes for an intensely minty flavor. Keep in mind that peppermint extract is potent, so start with a small amount and adjust to taste.
Why do my candy canes melt and stick to the pan?
This happens when candy cane pieces are too large or positioned near the edge of cookies where they’re exposed to direct heat. Crush them into very small pieces—roughly the size of chocolate chips or smaller—and check the bottoms of dough balls before baking, moving large chunks to the top or covering them with additional dough. Large candy cane pieces melt during baking and pool out of the cookies, creating a sticky caramelized mess that bonds to your baking sheet. Using parchment paper or a silicone baking mat also helps prevent sticking and makes cleanup much easier. Some bakers lightly dust crushed candy canes with flour before folding them into the dough, which helps prevent melting.
How do I prevent my peppermint chocolate chip cookies from spreading too much?
Use cool room temperature butter (64-68°F) and chill your cookie dough for at least three to four hours before baking. These two steps are critical for controlling spread and achieving thick, bakery-style cookies with the perfect texture. Butter that’s too warm will cause excessive spreading because the fat melts too quickly in the oven before the cookie structure sets. Additionally, make sure you’re measuring flour correctly using the spoon-level method rather than scooping directly from the bag, as too little flour also causes spreading. Baking the cookies straight from frozen rather than letting them thaw also helps them hold their shape better.
Can I make peppermint chocolate chip cookies without chilling the dough?
While you technically can bake the dough immediately, chilling is strongly recommended for better flavor development and texture. Unchilled dough spreads more during baking, resulting in thin, flat cookies rather than thick, chewy ones with crispy edges and soft centers. The chilling time allows the flour to fully hydrate and the fats to solidify, which gives you much better control over the final cookie shape and texture. Overnight chilling produces the deepest, most complex flavors as all the ingredients meld together in the refrigerator. If you’re truly in a hurry, chill the dough for at least one hour in the freezer, though longer is always better for peppermint chocolate chip cookies.
Conclusion
These peppermint chocolate chip cookies bring together everything you love about holiday baking—festive flavors, soft and chewy texture, and beautiful presentation that makes them perfect for any occasion. The combination of dark chocolate and crushed candy canes creates a perfect balance of rich and refreshing flavors that appeals to everyone from young children to adults. By following proper techniques like chilling the dough for several hours, measuring flour correctly using the spoon-level method, and crushing candy canes into small pieces, you’ll achieve bakery-quality results every single time you bake. Whether you’re baking for a holiday party, cookie exchange, or simply treating yourself and your family, these cookies deliver that magical taste of the season in every bite. The recipe is forgiving enough for beginner bakers but produces professional results that’ll have everyone asking for your secret. Make a double batch and freeze half the dough so you can enjoy fresh peppermint chocolate chip cookies throughout the entire holiday season.