Introduction
There’s something undeniably comforting about the aroma of apples bubbling under a crisp, golden topping. This Simple Apple Crumble (Apple Crisp) brings all the cozy flavors of fall—without the fuss. It’s a dessert that works whether you’re hosting dinner guests or just craving something sweet with minimal prep. With just a few pantry staples and fresh apples, this dish turns into a warm, spiced dessert that’s both nostalgic and satisfying. In this post, we’ll break down the story behind this classic crumble, the essential components of its flavor, and how you can master it at home with ease.
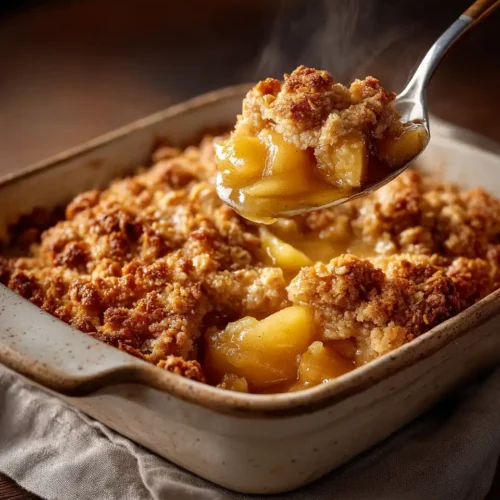
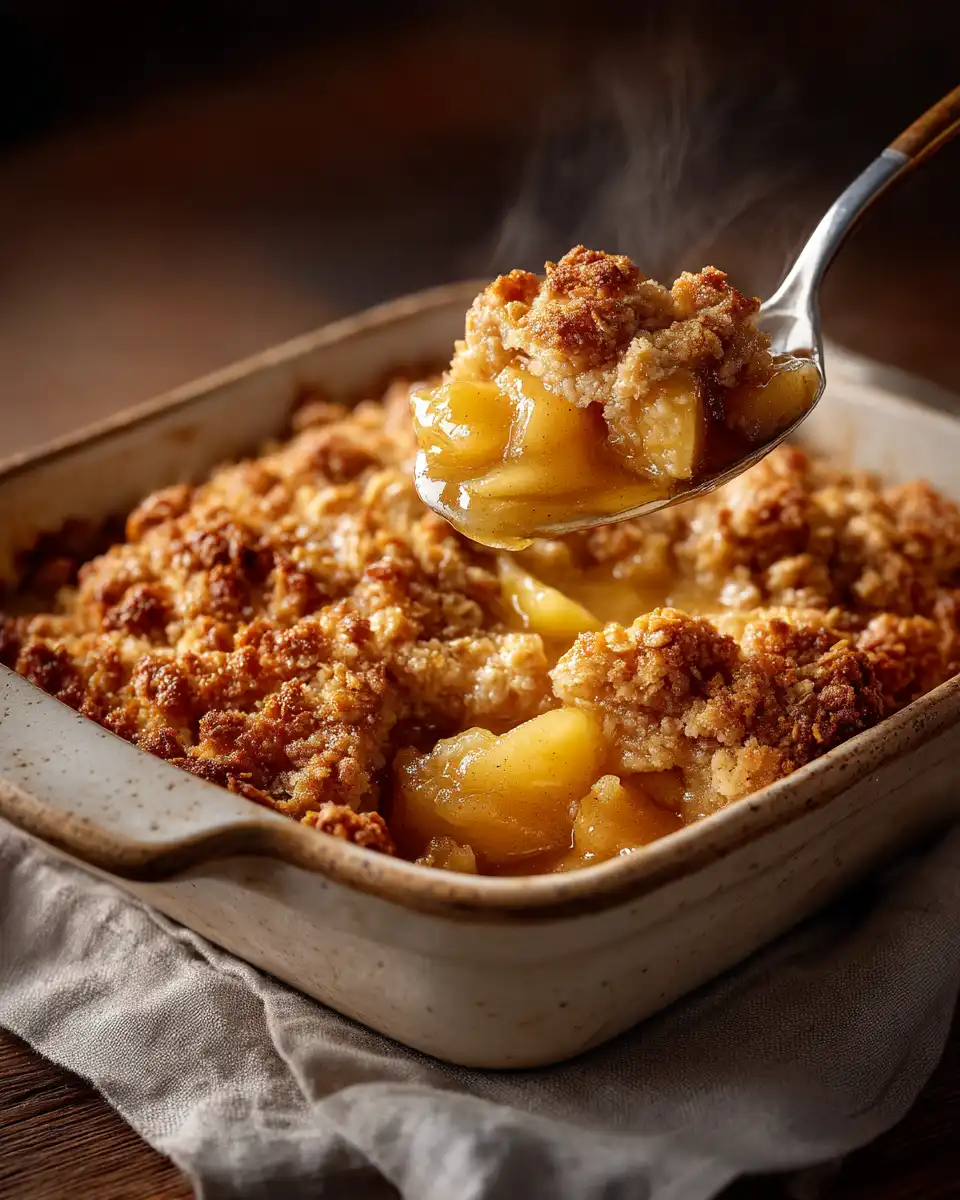
Simple Apple Crumble (Apple Crisp)
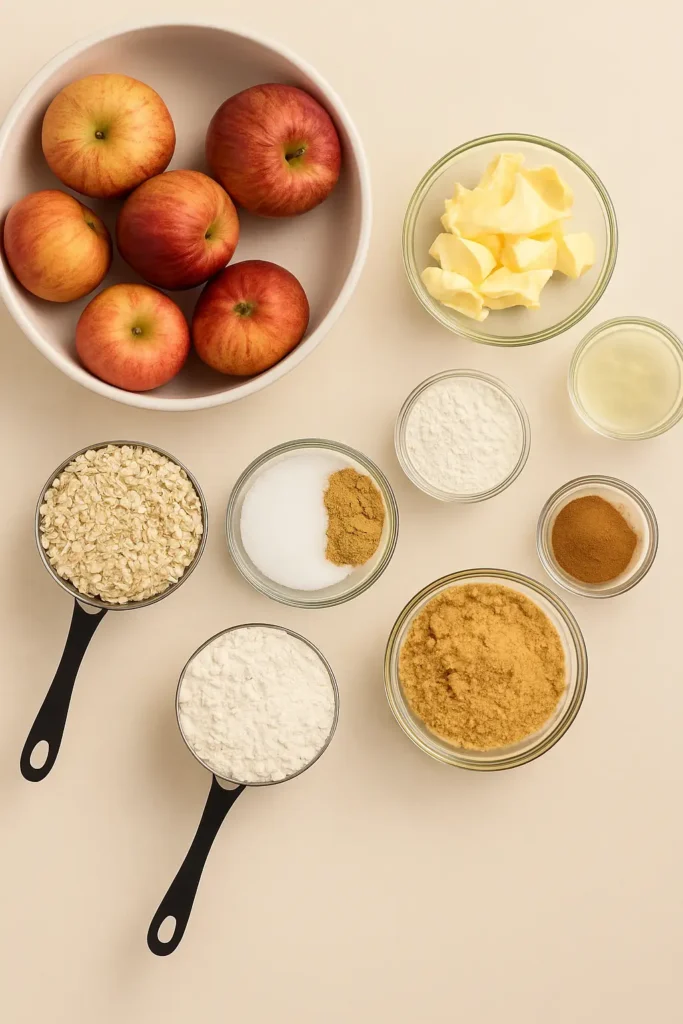
Ingredients
- 6 apples
- ½ tsp grated nutmeg or as needed
- ½ tsp cinnamon or as needed
- 2 Tbsp brown sugar
- 1 Tbsp all-purpose flour
- 1 Tbsp white sugar
- Juice of half a lemon
- Crumble topping
- 1 cup all-purpose flour substitute for self-raising flour
- 1 cup porridge oat
- 125 g butter you can use melted butter or cold softened. I use cold butter
- 1 cup light brown sugar or as needed
- ¼ tsp Salt I love to add a pinch to the topping to balance the sweetness
Instructions
- Preheat the oven at 180C/375F and prepare the baking dish
- Peel, core and chop the apples and transfer into the baking pan. Add flour, sugar, cinnamon, nutmeg, mix to combine then add half the juice of half a lemon and stir to combine
- In another bowl, combine, oat, flour, brown sugar, cold butter and a pinch of salt, rub with your fingers until you get a breadcrumbs-like consistency. Some chunks are allowed too.
- Sprinkle the crumble toppings on the prepared apple fillings
- Bake in an oven for 35 to 40 minutes until the topping is crispy, golden and apple filling bubbly.
- Remove from the oven, stand for a few minutes and Serve with vanilla ice cream or custard.
Notes
Calories: 483kcal
Carbohydrates: 83g
Protein: 3g
Fat: 17g
Saturated Fat: 11g
Cholesterol: 45mg
Sodium: 259mg
Potassium: 266mg
Fiber: 5g
Sugar: 60g
Vitamin A: 619IU
Vitamin C: 8mg
Calcium: 53mg
Iron: 1mg
The Story & Why It Matters
Why Apple Crumble Brings More Than Just Flavor
I remember the first time I made this simple apple crumble was on a chilly weekend when our heater had just gone out. I needed something warm, quick, and a little sweet to take the edge off the cold. With a basket of apples on the counter and a few baking basics in my cupboard, this dessert came together like a small act of magic. It filled the house with the scent of cinnamon and nutmeg—scents that felt like a hug.
My kids were wrapped up in blankets, and we all huddled together waiting for the oven timer to go off. That moment—passing around bowls of warm crumble topped with melting vanilla ice cream—reminded me why these simple desserts matter. They create moments. The best part? You don’t need any special skills or tools to make this one work. If you’ve got apples and an oven, you’re halfway there.
The Beauty of Basic Ingredients
The true genius of this simple apple crumble (apple crisp) lies in its humble ingredients. Just apples, oats, sugar, flour, butter, and spices. No eggs, no complex layering, and no fancy baking equipment. Unlike pies, which require careful crust handling, crumbles are all about freedom and flexibility.
Use any kind of apples you like—sweet, tart, or a mix. Add more cinnamon if you want. Reduce the sugar if your apples are already sweet. This dessert meets you where you are. It’s beginner-friendly and highly forgiving, but still yields results that feel thoughtful and homemade.
When you rub cold butter into the flour and oats, you create that crumbly topping that crisps up just right. Golden, crunchy on top, soft and syrupy underneath. Whether served warm with custard or cold from the fridge with yogurt, this dish is all about comfort, simplicity, and versatility.
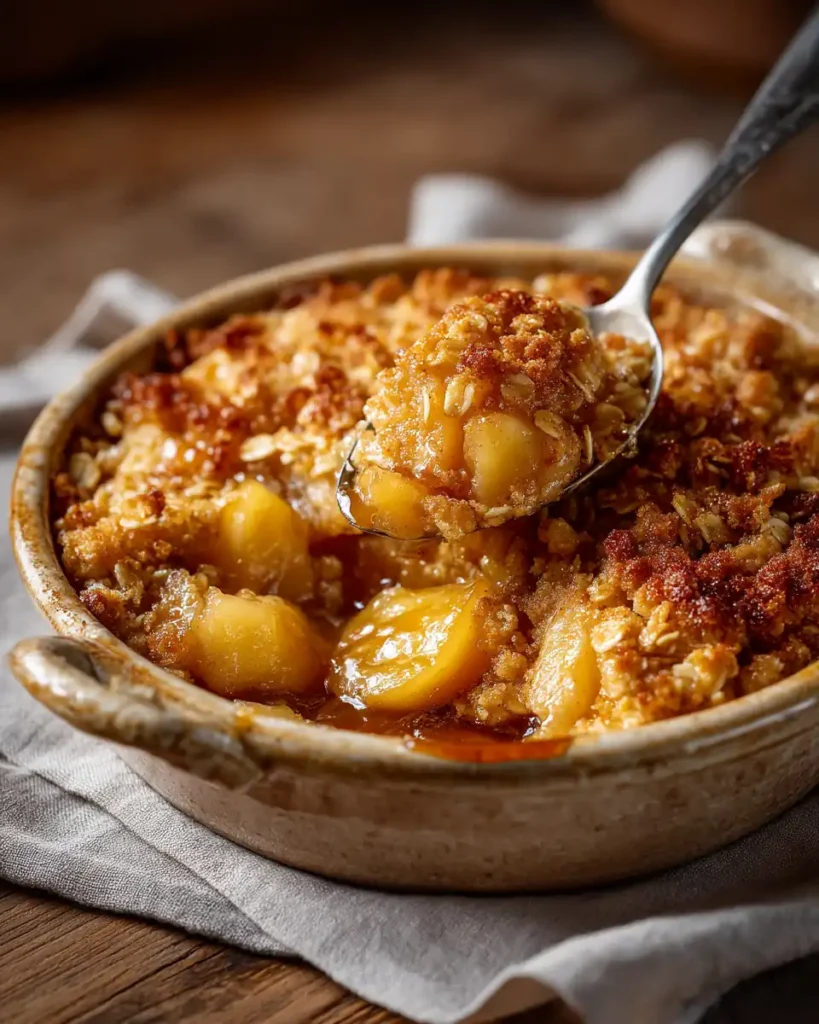
Apple Crumble Basics: Texture, Topping & Taste
How the Right Texture Makes All the Difference
Texture is everything in a good simple apple crumble. The contrast between the soft, syrupy apples and the crunchy oat topping is what sets this dessert apart. Get this balance right, and your apple crisp will never feel too soggy or too dry.
Start with the apples. They should be peeled, cored, and chopped evenly so they cook uniformly. Some people like their apples firm with a little bite; others prefer them soft and nearly jam-like. The good news is that this recipe accommodates both—adjust the baking time by a few minutes if needed. The addition of flour to the apples helps thicken the juices while baking, giving you a filling that’s thick and glossy rather than runny.
Now the topping—this is where the magic happens. The mix of oats, cold butter, brown sugar, and flour gets gently rubbed together by hand. Cold butter is key here. As the crumble bakes, those buttery clumps melt and crisp up, creating that signature crunch. If your topping looks a bit uneven, that’s good! Those irregular chunks bake into golden, crispy nuggets that give the crumble its rustic charm.
Why the Topping Matters More Than You Think
In this simple apple crumble (apple crisp), the topping isn’t just an afterthought—it’s the star. The oats add chew and earthiness, the brown sugar melts into a caramel-like coating, and the butter ties everything together with richness.
Don’t skip the pinch of salt. It seems small, but it sharpens the sweetness and adds a layer of depth. Some bakers even toss in a handful of chopped nuts like pecans or walnuts for added crunch, but the classic version doesn’t need it.
Whether you’re making this for a quiet night in or bringing it to a potluck, the topping will always steal the show—and leave people going back for seconds.
Tips for Baking the Perfect Simple Apple Crumble (Apple Crisp)
Choosing the Right Apples Makes a Huge Impact
Picking the right apples isn’t just about flavor—it’s about texture and balance. For this simple apple crumble, you want apples that soften as they bake but don’t completely lose structure. A combination of sweet and tart varieties works best. Granny Smiths hold their shape well and bring that bright acidity. Pink Ladies or Honeycrisps offer sweetness and fragrance. Mixing two or more types gives depth to the filling and prevents it from tasting flat.
Avoid apples that turn mushy quickly like Red Delicious—they’ll break down too much and turn your filling soupy. Whatever you choose, chop them into uniform chunks so they cook evenly. And don’t skip the lemon juice—it prevents browning and adds a slight tang that balances the rich topping.
Avoiding Common Mistakes in Apple Crisp Recipes
Even simple recipes can go wrong without a few mindful tweaks. One common mistake? Using melted butter in the topping instead of cold. Cold butter, when rubbed into the dry ingredients, creates those irresistible, crisp-edged crumbs. Melted butter will flatten your topping and make it greasy rather than crunchy.
Another common error is overcrowding the pan. When apples are packed too tightly, they steam instead of bake, making the filling too watery. Make sure your apples lie in a relatively even layer in your baking dish. That gives the heat room to circulate and caramelize the filling properly.
Also, resist the urge to underbake. Let the top get fully golden brown and the edges of the filling bubble. That bubbling is a sign that the juices have thickened. Let it sit for 5–10 minutes before serving so everything can settle slightly—this helps the texture hold up when scooped.
Whether served warm with ice cream or cool with whipped cream, this dessert delivers every time.
Serving, Storing & Making It Your Own
How to Serve Apple Crumble Like a Pro (Even at Home)
The moment your simple apple crumble comes out of the oven, the scent alone is enough to draw people into the kitchen. But serving it the right way makes the experience even better. Let it rest for at least 10 minutes after baking—this gives the juices time to settle so the filling doesn’t slide apart when scooped.
The classic choice? A generous scoop of vanilla ice cream on top. The cold cream melts over the hot crumble, creating that perfect hot-cold contrast. If you prefer something richer, warm custard or heavy cream poured over each serving works beautifully.
Want a fall twist? Add a drizzle of maple syrup or a dusting of cinnamon sugar just before serving. For a brunch treat, spoon leftovers over Greek yogurt or pancakes.
Storage & Fun Variations to Try Next Time
This simple apple crumble (apple crisp) stores like a dream. Keep leftovers in an airtight container in the fridge for up to 4 days. To reheat, pop a portion in the microwave or warm it in the oven at 350°F for 10–15 minutes. The topping stays crisp if you use the oven method.
Want to switch things up? Try swapping in other fruits. Pears, peaches, or even mixed berries pair wonderfully with the crumble topping. You can also mix in a handful of raisins or chopped dates with the apples for added sweetness and chew.
Gluten-free? Use almond flour and certified gluten-free oats in the topping. Vegan? Swap butter for coconut oil or a plant-based margarine. It’s that flexible.
No matter how you customize it, the heart of this dish stays the same: warm, comforting, and unfussy—just the way dessert should be.
Frequently Asked Questions
What’s the difference between apple crumble and apple crisp?
The terms are often used interchangeably, but traditionally, apple crisp includes oats in the topping while apple crumble doesn’t. In the U.S., this version—made with oats and brown sugar—is usually called apple crisp. In the UK, it’s often referred to as apple crumble. No matter the name, both are baked fruit desserts with a crumbly, buttery topping.
Can I make apple crumble ahead of time?
Yes, this simple apple crumble is perfect for prepping in advance. Assemble the filling and topping separately, then store in the fridge for up to 24 hours. When ready to bake, sprinkle the topping over the apples and pop it in the oven. You can also bake it fully, then reheat just before serving.
What apples are best for apple crumble or crisp?
A mix of tart and sweet apples works best. Granny Smiths offer firmness and tang, while Honeycrisp or Fuji add natural sweetness and moisture. This combination gives you a balanced flavor and a filling that holds its shape while baking.
How do I keep the crumble topping crispy?
Use cold butter and rub it into the flour and oats without overmixing. Baking until golden and bubbling also helps. If you store leftovers, reheat in the oven instead of the microwave to help the topping crisp back up.
Conclusion
If you’re looking for a warm, nostalgic dessert that requires minimal effort but delivers big flavor, this simple apple crumble (apple crisp) is exactly what you need. With its juicy apple filling and buttery oat topping, it’s the kind of dessert that makes any day feel a little more special. Whether served fresh out of the oven or enjoyed cold the next morning, it’s always comforting, always easy, and always worth it.