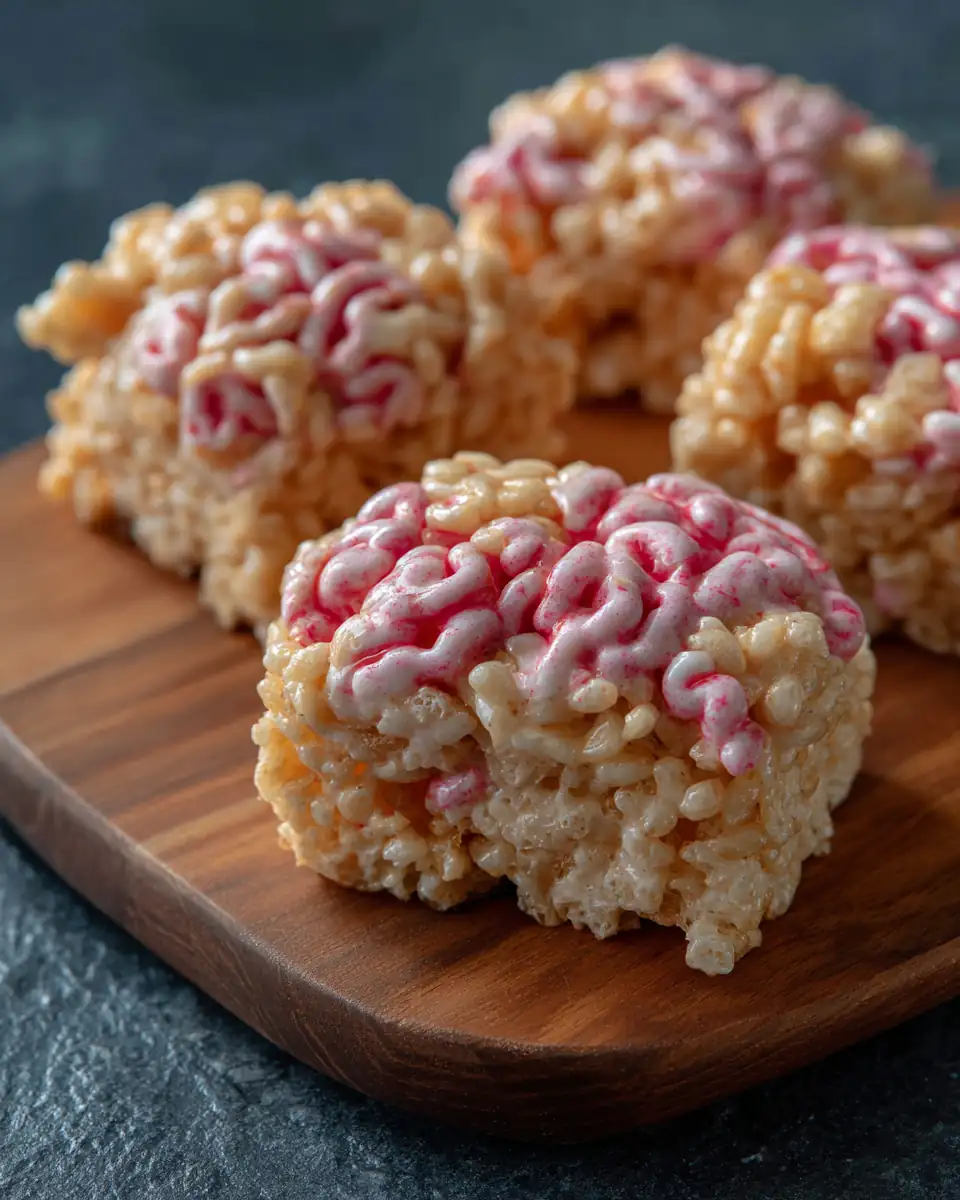
Looking for a Halloween treat that’s spooky, sweet, and a little brainy? Rice Krispies Treat Marshmallow Brains are your go-to. These no-bake goodies are simple to make, fun to shape, and a perfect mix of eerie and edible. Whether you’re prepping for a Halloween party or crafting with kids, these treats offer playful gross-out appeal without being too scary. In this article, you’ll get the full step-by-step breakdown, tips to get the perfect “brain” texture, and answers to all the common questions people ask about this creepy crowd-pleaser.
A Halloween Treat to Remember
Why We Made Marshmallow Brains
It all started one October afternoon with a “gross snacks” challenge at my kids’ school. They needed spooky-themed treats for their classroom party, and I needed something no-bake, low-mess, and ideally brain-shaped. That’s when I remembered the old-school Rice Krispies treats that never failed me growing up. With a little shaping, a few pink marshmallows, and some red icing, I realized we could create something perfectly weird—Rice Krispies Treat Marshmallow Brains.
We melted butter and pink-and-white marshmallows together until they became a smooth, gooey mess. It didn’t look promising at first—just a strange, sticky swirl. But after adding the crispy rice cereal, the magic happened. Suddenly, the mixture was moldable, warm, and surprisingly easy to work with when we oiled our hands. The result? Five creepy little “brains” that set just in time for party drop-off.
That same night, the teacher texted me: “The brains were a hit. The boys fought over the last one.” Who knew marshmallow brains could win Halloween?
What Makes This Treat Work
These Rice Krispies Treat Marshmallow Brains work because they hit the sweet spot between gross and cute. They’re soft, sticky, and satisfyingly squishy—like any pretend brain should be—but completely safe to eat. Plus, they’re made from pantry staples you likely already have: butter, marshmallows, and rice cereal.
What sets them apart is the pink coloring from the marshmallow blend and the clever shaping method. A little oil on your hands and tools makes sculpting easier than it looks, and that final drizzle of red writing gel brings the whole thing to life—or undead, depending on your theme.
They’re also versatile. You can skip the food dye and red icing if you’re making them for younger kids, or amp up the gore for teen parties. Either way, this recipe is all about fun, not stress—and the creepy brain look always gets a reaction.
Rice Krispies Treat Marshmallow Brains
Ingredients
- 4 tablespoon butter
- 2 cups pink and white marshmallows – see note 1
- ¼ teaspoon salt
- 4 cups Rice Krispies – see note 2
- 1 tube red writing icing – optional
Instructions
- Line a large tray with non-stick paper
- Place a pan on the stove and half fill with boiling water.
- Put the butter and marshmallows into a heatproof bowl and set it over the boiling water.
- Bring the water back to a simmer.
- Let the butter melt and once it has stir occasionally until the marshmallows are completely melted and smooth (see note 3)
- Add the salt and stir to combine.
- Turn the heat off from under the pan and add the rice krispies to the melted mixture.
- Gently stir until the mixture is well combined. It will seem like this will never come together but eventually it will all be coated.
- Lightly oil two tablespoons (front and back) and use them to scoop and shape a mound, set the mound down onto your prepared tray and with lightly oiled fingers flatten to a rough brain shape.
- Repeat until you have 5 ‘brains’
- Lightly coat a table knife with oil and use it to press the central indent into your brain. Use your oiled fingers to hold the oval shape together.
- Continue forming 5 brains and then doing the indents until you have used all the mixture.
- Use the red icing to add spots or drizzles of blood to your brains.
- Leave the brains to set for 4-5 hours.
Notes
Any crispy rice cereal is fine
Don’t panic, as the marshmallows start to melt the mixture will look awful and like it is never going to come together, just keep heating and stirring occasionally and it will eventually become a smooth paste. Nutrition
Calories: 87kcal | Carbohydrates: 14g | Fat: 3g | Saturated Fat: 1g | Cholesterol: 8mg | Sodium: 113mg | Potassium: 9mg | Sugar: 6g | Vitamin A: 590IU | Vitamin C: 4.7mg | Calcium: 1mg | Iron: 2.3mg
Mastering the Marshmallow Mix
Getting the Marshmallow Texture Right
If you’re wondering how to melt marshmallows without ending up with a scorched, sticky mess, here’s the method that works every time. Instead of microwaving, place a heatproof bowl over a pot of simmering water. This gentle, indirect heat melts both the butter and marshmallows evenly. It might look clumpy or hopeless at first—but don’t panic. Keep stirring occasionally. Eventually, you’ll have a glossy, smooth mix that forms the base of your Rice Krispies Treat Marshmallow Brains.
Using a mix of pink and white marshmallows gives the final brain treats their signature soft-pink color. Standard marshmallows work fine, but mini ones melt faster. The salt adds balance, cutting the sweetness just enough to keep each bite enjoyable, not overwhelming.
Here’s a helpful table for choosing marshmallows:
| Type | Melting Speed | Color Effect |
|---|---|---|
| Standard Pink & White | Medium | Light Brain Pink |
| Mini Marshmallows | Fast | Slightly Brighter Pink |
Mixing Without Making a Mess
Once your marshmallow mixture is silky, it’s time to fold in the cereal. This step always feels like a workout. You’ll stir and stir—and it may seem like the Krispies won’t ever fully coat. But stay with it. Eventually, the mixture becomes sticky, uniform, and just pliable enough for shaping.
For this recipe, four cups of Rice Krispies is ideal. It keeps the texture soft but structured, and you’ll be able to mold it easily before it firms up. If you wait too long, the mixture cools down and becomes hard to work with. So keep your bowl over the warm pan (even with the heat off), and scoop while it’s still warm.
Lightly oil your tools and hands to prevent sticking. Two tablespoons work best to scoop rounded mounds, and your fingers can flatten and press the shape into a brain. You don’t need sculpting skills—just an idea of an oval and a central indent.
Shaping the Brains and Adding Details
Easy Brain Sculpting Tricks
Now for the fun part—turning your sticky mound into a spooky, brain-like shape. While it might sound complicated, sculpting these Rice Krispies Treat Marshmallow Brains is easier than you’d expect. The trick is warmth and oil. Work while the mixture is still warm, and coat your hands and tools with a little neutral oil to keep everything from sticking.
Use two tablespoons (lightly oiled, front and back) to scoop the mixture into rounded mounds. Place them onto a tray lined with parchment paper. Then, gently flatten the top and shape the sides with your fingers until you get a soft oval form. They don’t need to be perfect—that uneven, lumpy look actually makes them more brain-like.
Once you’ve formed five mounds, use a lightly oiled table knife to press a shallow groove down the center of each one. This forms the distinctive line that separates the brain hemispheres. If your shapes spread or look a little messy, just push the edges back in gently with your fingers. The mixture is forgiving while it’s still warm.
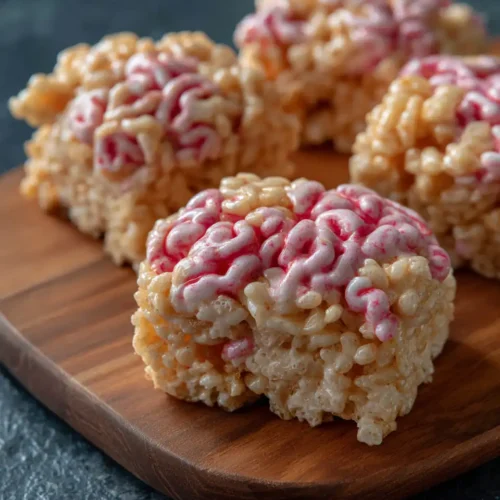
Creepy Final Touches for Halloween
Now that your brains are shaped, it’s time to give them that classic Halloween creep factor. Grab a tube of red writing icing and add little drizzles, lines, or even “blood spots” across the top of each treat. This extra detail instantly transforms a simple pink puff into a gross-out dessert kids love.
You can go light with the icing or get dramatic—it’s up to your audience. For younger kids, a few light streaks are enough. For a Halloween party or older kids, go all out with oozing red lines.
Once decorated, let the treats sit at room temperature for 4–5 hours to fully set. No fridge needed—just patience. After they’ve firmed up, store them in an airtight container with wax paper between layers. They’ll keep for up to three days, but chances are, they’ll be gone long before then.
Make-Ahead Tips and FAQs Answered
Can You Make These Marshmallow Brains Ahead?
Absolutely. One of the best things about Rice Krispies Treat Marshmallow Brains is how well they hold up. Once they’re fully set (after about 4 to 5 hours), you can store them for up to three days. Just place them in an airtight container lined with wax or parchment paper to keep them from sticking together. No need to refrigerate unless your kitchen runs hot—cool room temperature is perfect.
If you’re prepping for a party, you can shape and decorate the brains the night before. Let them set overnight uncovered, then store them the next morning. The red writing icing stays intact, and the texture remains soft but chewy.
Planning even further ahead? You can make and freeze the base mixture (before shaping) for up to a week. Let it come back to room temperature slightly, then warm it gently over a pan of simmering water to make it pliable again before shaping.

Frequently Asked Questions About Rice Krispies Treat Marshmallow Brains
How do you make Rice Krispies Treats look like brains?
Start by shaping the sticky cereal mixture into rough ovals using oiled spoons and hands. Press a central line with a knife to mimic brain hemispheres. The uneven surface and a drizzle of red icing give it that realistic “brainy” effect.
Can you use mini marshmallows instead of regular ones?
Yes, mini marshmallows melt faster and are a great choice. Use the same amount (2 cups), and you’ll get the same gooey base perfect for shaping.
How long do they take to set?
You’ll need to let the treats set for at least 4–5 hours at room temperature. This allows the shape to hold and the icing to dry. For quicker setting, place them in a cooler spot, but avoid refrigeration—it can make the texture too firm.
Can you make these ahead of a Halloween party?
Yes! Shape and decorate them a day before, then store in an airtight container. They’ll stay fresh for up to 3 days, making them a perfect prep-ahead treat.
Conclusion
If you’re looking for a Halloween snack that’s spooky, sweet, and a hit with kids (and adults), Rice Krispies Treat Marshmallow Brains are your answer. They’re quick to make, fun to shape, and look delightfully gross when topped with red icing. Whether you’re hosting a party, prepping treats for trick-or-treaters, or just getting festive with the family, this easy recipe brings creativity to your kitchen—no fancy equipment required.