There’s nothing more frustrating than fudge that won’t set when you’ve got guests arriving—or kids hovering. I’ve been there more times than I’d like to admit. And that’s exactly why this no fail fudge recipe became a staple in my kitchen. With just three ingredients and no candy thermometer in sight, it’s smooth, rich, and foolproof. Whether you’re prepping treats for the holidays or just need a quick chocolate fix, this fudge delivers. In the story below, I’ll share how it became my emergency dessert hero—and why it now lives on a handwritten card in my recipe tin.
My Go-To No Fail Fudge Story
Why I Needed a No Fail Fudge Recipe
The first time I attempted fudge, I did everything wrong. I was running late for a holiday dinner and thought I could whip up a batch without reading the recipe all the way through (rookie mistake). I melted chocolate over high heat, skipped the foil in the pan, and didn’t chill it long enough. What I ended up with was a sticky, oily mess that glued itself to the baking dish like concrete. Not exactly the festive squares I had imagined.
That’s when I went searching for a no fail fudge recipe—something reliable and simple. I didn’t want to mess with candy thermometers or sugar stages. I wanted melt-and-pour, stir-and-chill simplicity. And I found it.
When I Finally Got It Right
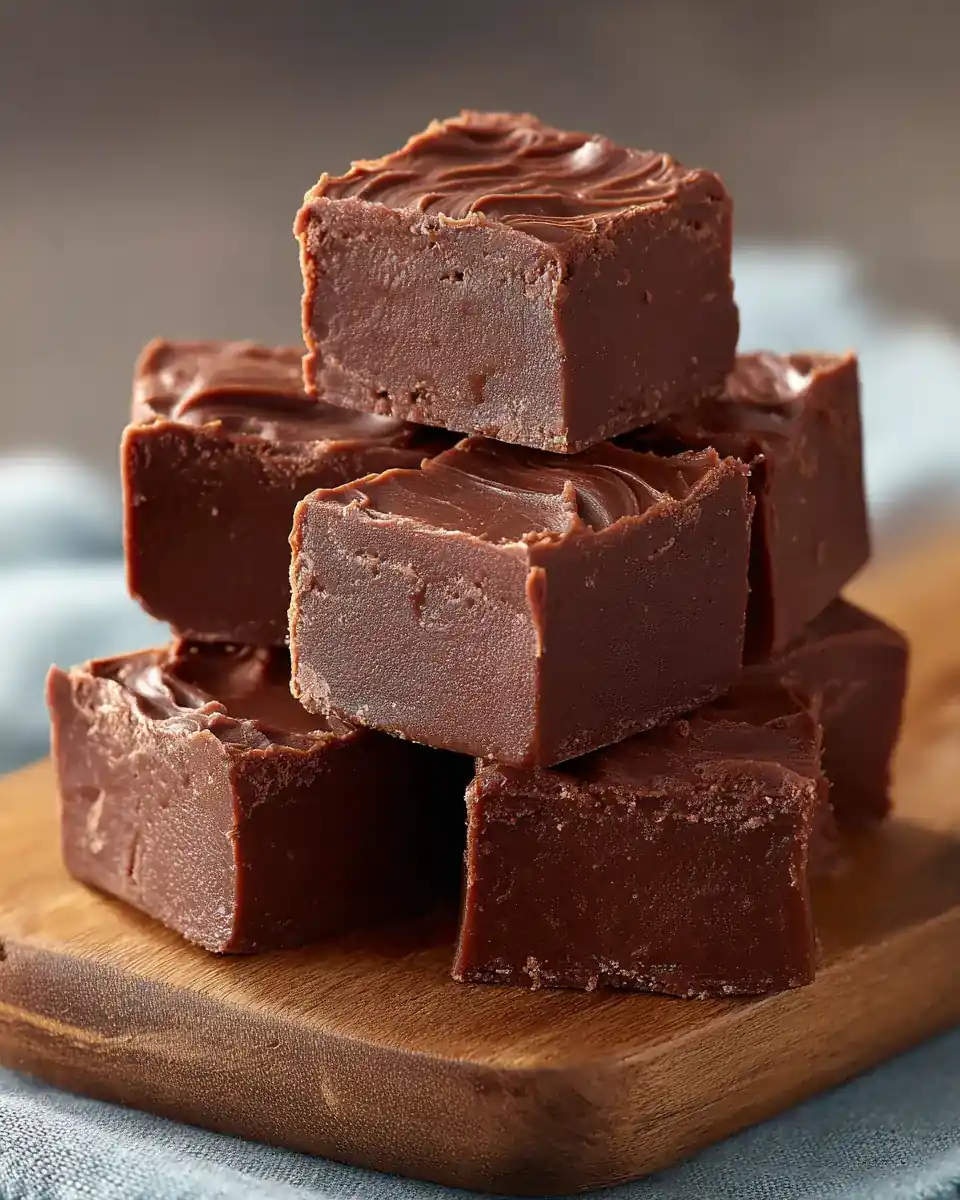
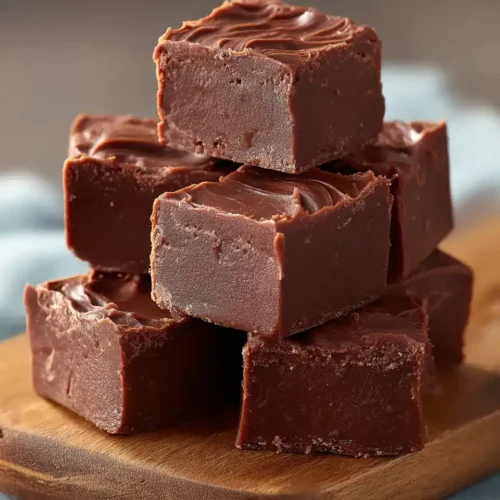
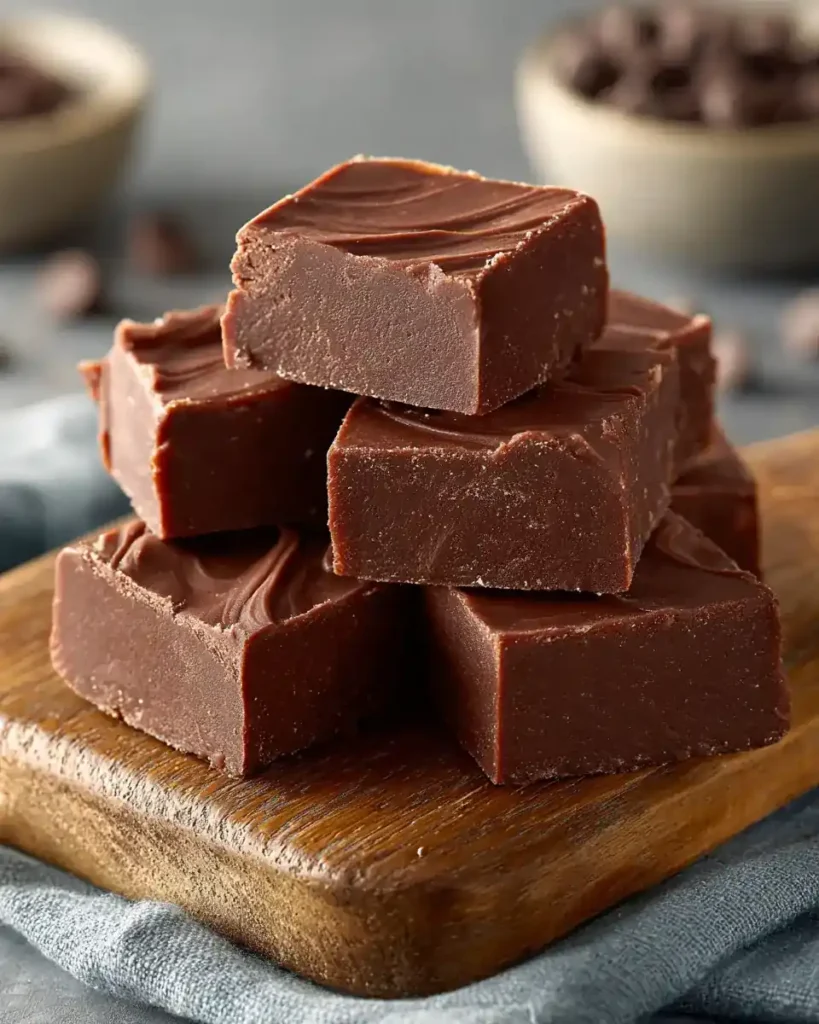
The second attempt was different. I followed the instructions exactly: medium-low heat, constant stirring, and patience. The texture turned glossy and thick—like frosting that knew what it was doing. After setting overnight in the fridge, I cut it into neat, glossy squares. They held their shape. They didn’t crumble. And the taste? Rich, velvety, and intensely chocolatey.
This recipe hasn’t failed me since. I’ve made it for birthday favors, teacher gifts, and even for my local bake sale. It always works. That’s what makes it so special—not just the ingredients, but the confidence it gives even on hectic baking days.
Easy Fudge Recipe (NO FAIL!)
Ingredients
- 3 cups semi-sweet chocolate chips
- 14 oz. sweetened condensed milk
- 1/4 cup butter
Instructions
- Line an 8×8 square baking pan with foil (bring foil up over the sides of the pan for easy removal) and spray lightly with nonstick cooking spray. Set aside.
- Add chocolate chips, sweetened condensed milk and unsalted butter in a saucepan.
- Heat the fudge mixture over medium-low heat, stirring constantly with a spatula until butter and chocolate are melted, and the mixture is smooth. This typically takes about 7-8 minutes on a gas stove, and the fudge should be smooth, even, and much like frosting.
- If you underheat, the chocolate could be soupy, and if you overheat, it could seize up and harden in the pan. This is a slow and steady process while stirring.
- After the fudge is smooth and melted, pour fudge into the prepared pan and spread evenly with the back of a spoon.
- Refrigerate the fudge pan overnight or until completely firm.
- Once firm, carefully lift the foil from the pan and set it on a cooking board. Peel foil from the sides of the fudge.
- Use a large, sharp knife to cut into squares, wiping chocolate from the knife blade (carefully) between cuts for a smooth cut.
- Makes 42 squares
Notes
NOTES: See full recipe article for tips on cutting and setting fudge!
I sometimes set my fudge quicker in the freezer.
Keep fudge in the fridge in an airtight container to store leftovers. Nutrition
Serving: 42squares | Calories: 110kcal | Carbohydrates: 15g | Protein: 2g | Fat: 6g | Saturated Fat: 4g | Polyunsaturated Fat: 2g | Cholesterol: 7mg | Sodium: 26mg | Fiber: 1g | Sugar: 14g
Why This No Fail Fudge Recipe Works Every Time
The Science Behind Fail-Proof Fudge
What sets this no fail fudge recipe apart is its simplicity—and the dependable science behind it. Unlike traditional fudge recipes that involve boiling sugar and monitoring temperatures with a candy thermometer, this one skips all that. The key? Sweetened condensed milk.
Sweetened condensed milk acts as both a sweetener and a binder. It’s thick, already cooked, and stable—meaning it won’t crystalize or separate when heated gently. This eliminates most of the classic reasons fudge fails. When combined with semi-sweet chocolate chips and butter, you get a rich, cohesive base that melts into a smooth, pourable mixture.
The heating process is just as important. Cooking the mixture slowly over medium-low heat, while stirring constantly, allows the ingredients to blend without risk of burning or splitting. It gives the butter time to melt and the chocolate time to melt evenly without seizing. Rushing this step—or overheating—can lead to gritty, greasy, or hardened fudge. But take your time, and the reward is silky and sliceable.
The smoothness you see in the final fudge squares comes from properly emulsified ingredients. Stirring constantly is essential. It prevents uneven melting and helps everything come together into that glossy, frosting-like texture that signals the fudge is ready to set.
Best Tools and Techniques for Fudge Success
You don’t need fancy gear to get this recipe right, but having the right tools on hand makes all the difference. Start with a medium saucepan—not too wide, or your mixture might heat too fast. Use a sturdy silicone spatula or wooden spoon to stir. These hold up well to heat and are gentle on your pan and the chocolate.
For shaping and cooling, line an 8×8-inch square pan with foil. Be sure to bring the foil up over the edges—this makes removing and cutting the fudge easier once it’s set. Lightly spray the foil with cooking spray to prevent sticking.
After pouring the smooth fudge into the pan, spread it evenly with the back of a spoon. This creates a clean, flat surface that sets into perfect squares. Then, chill the pan in the refrigerator—overnight is best, but a few hours in the freezer can work if you’re short on time.
When it’s time to cut, use a large, sharp knife. Wipe the blade clean between slices for neat, bakery-style squares. A warm knife (run under hot water and dried) can glide through the cold fudge without cracking or crumbling.
These small steps make a big difference in the final result. When followed with care, this no fail fudge recipe gives consistent results—firm squares, rich taste, and the kind of smoothness that looks impressive but feels effortless.
Customizing Your No Fail Fudge
Add-ins and Flavor Variations
One of the best parts about this no fail fudge recipe is how easily you can change it up. The base is rich and chocolatey, but it’s also a perfect canvas for creativity. Whether you’re adding crunch, salt, or swirl, the mix-ins you choose can take this fudge from everyday to unforgettable.
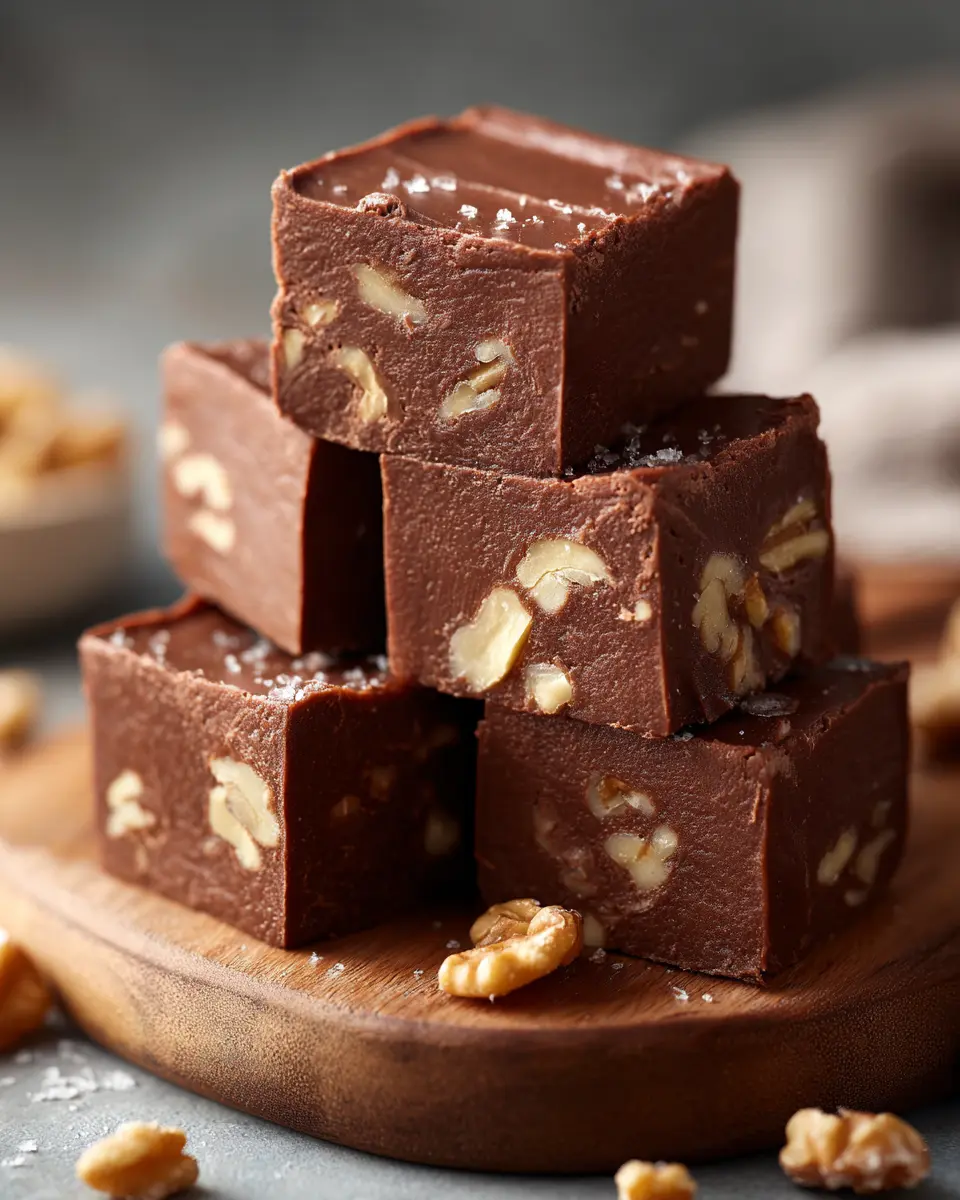
For a bit of texture, stir in ½ cup of chopped walnuts, pecans, or almonds after the mixture is melted but before pouring it into the pan. You can also press them into the top for a decorative finish. Crushed peppermint candy adds a festive touch, especially around the holidays.
Love sweet and salty desserts? A light sprinkle of flaky sea salt on top creates contrast that makes the chocolate pop. You could even mix in mini pretzels or crushed potato chips for something unexpected.
If you’re a fan of layered flavors, swirl in a few tablespoons of peanut butter or caramel sauce before chilling. Use a butter knife to gently marble the topping into the fudge for a pretty and flavorful finish.
Want a twist on the classic chocolate? Replace the semi-sweet chocolate chips with white chocolate chips or butterscotch morsels. These still melt beautifully with sweetened condensed milk but bring new flavor notes. Just remember—whatever variation you choose, keep the heating low and the stirring steady.
You can even add a splash of vanilla, peppermint, or orange extract (about ½ teaspoon) for subtle changes that elevate the final result.
How to Gift or Serve It Creatively
This fudge doesn’t just taste good—it looks great when presented right. That’s why I often make it for gifts and gatherings. Once chilled and cut into neat squares, you’ve got 42 perfect little bites just waiting to be shared.
To gift the fudge, line a small tin or gift box with parchment paper. Stack the squares neatly in layers, adding a sheet of paper between each row to keep them from sticking. Tie the box with twine or a ribbon, and you’ve got a thoughtful handmade gift that feels like it took much more time than it did.
For bake sales or parties, display the fudge on a platter or in mini cupcake liners. It gives each piece a polished look while making them easy to grab and go. You can even wrap each square in wax paper or foil, twist the ends, and serve them as candy-style treats.
Another idea? Add labels with flavor variations or fun names (“Midnight Walnut,” “Snowstorm Peppermint,” “Classic Creamy Chocolate”) for a little extra personality. These tiny details make your no fail fudge recipe not just tasty, but memorable.
Whether you’re gifting, serving, or just sneaking one from the fridge, this recipe adapts to the occasion. It’s the kind of sweet that looks as good as it tastes—and never lets you down.
Storage, Shelf Life, and Mistake-Proof Tips
How to Store Fudge So It Stays Perfect
Once your no fail fudge recipe has chilled and been cut into clean squares, the next step is storing it properly so every piece stays just as good as the first. Fudge may seem sturdy, but without the right care, it can dry out, turn sticky, or absorb fridge odors.
Start by placing the squares in an airtight container. Use parchment or wax paper between layers to keep them from sticking together. For short-term storage, keep the container in the fridge. The cool temperature helps maintain that firm texture, especially if your kitchen tends to run warm.
If you’re planning to keep the fudge for more than a week, freezing is a great option. Wrap each square individually in wax paper or plastic wrap, then seal them in a freezer-safe bag or container. When you’re ready to enjoy them, let the fudge thaw in the fridge—not at room temperature—to avoid moisture buildup or texture changes.
In the fridge, the fudge lasts about 2 to 3 weeks. In the freezer, it can stay fresh for up to 3 months. Just make sure it’s well sealed—fudge absorbs odors like a sponge, and no one wants garlic-scented chocolate.
Avoid leaving the fudge out on the counter for extended periods, especially in warm weather. The butter content can soften and turn greasy if left at room temp too long.
Quick Fixes for Common Fudge Mistakes
Even a no fail fudge recipe can go off track if you rush or tweak things too far. But don’t worry—most fudge flops can be fixed or at least improved with a few tricks.
If your fudge turns out too soft and won’t set, chances are the mixture wasn’t heated long enough. Try chilling it in the freezer for a few hours. If that doesn’t help, melt it down again in the pan over low heat and stir until thicker. Then re-pour and refrigerate.
If it’s too dry or crumbly, it may have been overcooked. Adding a tablespoon of warm milk and gently reheating can sometimes bring it back to life. Stir well and pour again.
Got greasy fudge with butter pooling on top? That’s often from high heat. You can sometimes salvage it by re-melting over lower heat, stirring gently until it re-binds. But for best results, stick to medium-low heat and constant stirring from the start.
If your knife drags or crumbles the edges while cutting, warm the blade in hot water, dry it, and try again. A clean, warm knife slices through cold fudge like a dream.
These little fixes can make the difference between tossing a batch and saving it. But honestly, once you follow this no fail fudge recipe step by step, the chances of needing a rescue are pretty slim.
Frequently Asked Questions
What makes fudge fail to set properly?
Fudge typically fails to set because it’s either underheated or not mixed evenly. In a no fail fudge recipe, the mixture must reach a smooth, frosting-like consistency over medium-low heat. Rushing the process or removing it from the heat too soon can leave you with soft, gooey fudge that won’t firm up—even after chilling.
Can I use evaporated milk instead of sweetened condensed milk in fudge?
No, evaporated milk is not a substitute for sweetened condensed milk in a no fail fudge recipe. Sweetened condensed milk is thicker, contains added sugar, and helps the fudge set properly. Evaporated milk lacks the sugar content and structure needed, which will likely result in runny or separated fudge.
How long does no fail fudge last in the fridge?
When stored in an airtight container with parchment between layers, no fail fudge lasts about 2 to 3 weeks in the fridge. For longer storage, freeze the squares for up to 3 months. Just make sure to let them thaw slowly in the fridge to keep the texture smooth and creamy.
What’s the best way to cut fudge cleanly into squares?
Use a large, sharp knife warmed under hot water, then wiped dry before each cut. This helps the blade glide through cold fudge without cracking or crumbling. A warm knife paired with a firm, chilled batch of no fail fudge gives you those clean, professional-looking squares every time.
Conclusion
This no fail fudge recipe is more than just a quick fix for chocolate cravings—it’s a reliable, go-to treat that you can make with confidence every time. With just three ingredients, a little stirring, and some patience, you’ll have smooth, rich fudge that sets like a dream and slices beautifully.
Whether you’re gifting it, serving it at a party, or sneaking a piece straight from the fridge, this recipe delivers on taste, texture, and ease. It’s perfect for beginners and a must-have for busy bakers who want homemade results without the stress.
So next time you need a sure-thing sweet, skip the guesswork. This no fail fudge recipe is the one to keep in your back pocket—and maybe even your freezer.