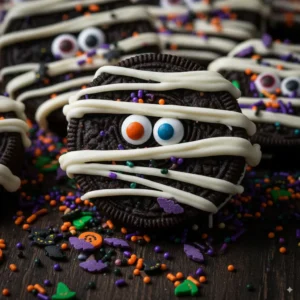
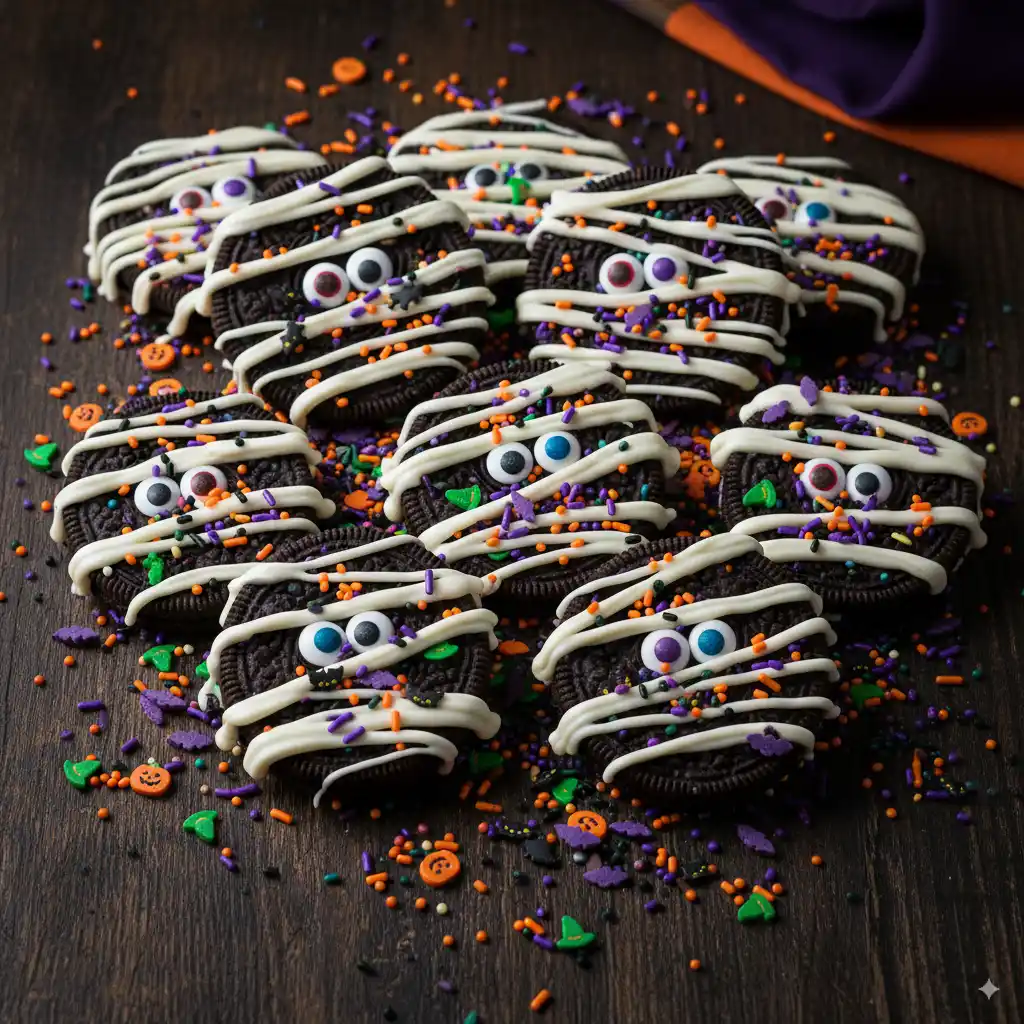
These Mummy Halloween Oreo Cookies are fast, festive, and require no baking. If you’re short on time but still want something playful and themed for spooky season, this recipe works. Candy melts, candy eyes, and a pack of Oreos are all you need. The result? Treats that look great on a Halloween dessert table and disappear fast. The cookie base is already sweet and crisp, so all that’s left is a quick decorative coating. These mummy cookies are ideal for kids, parties, or school events where safety and speed matter. You’ll have a full tray ready in less than 30 minutes.
How to Make Mummy Halloween Oreo Cookies Quickly
The Setup That Saves Time
Start by placing all your Oreos in a single layer on a wire cooling rack. This keeps the underside dry while you decorate. Using a cooling rack also lets excess coating fall away without pooling, which helps the cookies look clean when finished. Next, melt the candy melts. Use the microwave or stovetop, following the package directions. Stir well to remove clumps. Pour the smooth melted candy into a piping bag. If you don’t have one, use a resealable plastic bag with the corner snipped. This step sets the pace—once the candy is ready, you must move quickly before it hardens.
Creating the Mummy Effect
Pipe lines of melted candy across the top of each Oreo. There’s no need for perfect lines—the random crisscross effect creates a better “wrapped” look. Use medium pressure to get visible bands. While the coating is still wet, gently press two candy eyes near the upper third of each cookie. Space them slightly apart. Avoid touching the surface once the eyes are in place. Let the cookies sit undisturbed until the candy hardens. If you need them ready fast, place the tray in the fridge for 10 minutes. Once set, they’re ready to serve or pack.
Making the Most of Mummy Halloween Oreo Cookies
Choosing the Right Ingredients
Stick with classic Oreos for structure. Their firm chocolate wafers hold up under melted candy without becoming soggy. Double-stuffed Oreos can work too, but they are heavier and may slide when piping the bandages. Use white vanilla-flavored candy melts instead of standard chocolate. These coat smoothly and dry with a clean finish. Avoid almond bark or chocolate chips, which can become too soft once set. For piping, always melt small batches to avoid thickening mid-process. If the mixture cools, reheat gently in 15-second bursts.
Candy eyes come in various sizes. Choose ones that are slightly oversized for visibility. If they are too small, they get lost in the decoration. Press them gently into the melted coating before it sets. If your kitchen is warm, cool the tray slightly before decorating so the coating doesn’t run. Keeping everything dry ensures the candy melt sticks properly to the Oreo surface.
Tips for Storing and Transporting
Once dry, store Mummy Halloween Oreo Cookies in a single layer inside an airtight container. Place parchment or wax paper between layers to prevent sticking. Keep them at room temperature for up to one week. Avoid humid areas or the fridge—excess moisture causes the coating to soften or streak. If transporting to an event, place each cookie in a mini cupcake liner to avoid smudges.
For gifting, wrap each cookie in a clear treat bag and seal with twist ties. Labeling is optional but helps if there are allergy concerns. These cookies also freeze well for up to a month, though the appearance may dull slightly. Thaw at room temperature before serving. Avoid stacking during thawing to keep bandages crisp.
Mummy Halloween Oreo Cookies
Ingredients
- 1 14.3 ounce package Oreos
- 1 12- ounce package vanilla candy melts
- 1 package candy eyes
Instructions
- Spread the Oreos in an even layer on top of a wire cooling rack.
- Melt the candy melts according to the package instructions, then pour the melted candy into a piping bag.
- Pipe mummy bandages over the top of the Oreos with the melted candy.
- Place two candy eyes on top of each Oreo.
- Allow the chocolate to set before serving.
Notes
Calories: 65kcal
Carbohydrates: 9g
Protein: 1g
Fat: 3g
Saturated Fat: 1g
Sodium: 37mg
Potassium: 9mg
Fiber: 1g
Sugar: 6g
Calcium: 3mg
Iron: 1mg
Decorating Mummy Halloween Oreo Cookies Like a Pro
Getting the Mummy Look Right
Visual impact matters with themed treats. For Mummy Halloween Oreo Cookies, the “bandage” pattern does not need to follow any specific rule. Aim for randomness. Crisscross lines in diagonal and horizontal directions to mimic wrapped cloth. Start from the top, work downward, and use even spacing between passes. If your candy melt starts thickening, massage the piping bag gently to keep it flowing. Avoid squeezing too hard. Thick lines make the cookie look bulky and can cause uneven setting.
You want the eyes to appear as though they peek through the wraps. Placing them too low hides them under candy lines. Set them near the top third of each cookie. Make sure the surface is still wet when applying the eyes so they adhere properly. If they fall off, reapply a small dot of melted candy as glue and press again. Let each tray sit flat while setting—don’t shift or tilt.
Fixing Common Decoration Issues
Sometimes the coating cracks or gets lumpy. That usually happens when candy melts are overheated. Use low power settings and stir between intervals. If bubbles appear, gently tap the piping bag on a surface to release air before decorating.
If your eyes slide off after placing them, the coating may be too hot or too thin. Let it cool for one minute before trying again. To repair broken lines, reheat a small batch and patch gently with a toothpick. Don’t try to re-melt the entire coating on the cookie—it will ruin the design. Instead, touch up only the problem area.
Once you decorate a few cookies, you’ll get the rhythm. Finish the tray, let everything harden, then prepare for serving or packing.
Customizing and Scaling Mummy Halloween Oreo Cookies
Easy Variations for Different Occasions
You can customize Mummy Halloween Oreo Cookies for different looks or flavors. Swap classic Oreos for golden ones if you want a lighter color base. For themed color variations, use tinted candy melts—light green or purple adds a twist. Add food coloring oil-safe dyes directly to the melted candy before piping.
Want extra texture? Add crushed cookie crumbs or edible glitter after piping the bandages. Just sprinkle before the coating sets. You can also use mini chocolate chips or red hots instead of candy eyes for a playful look. These changes work best if you stick to one variation per batch to keep results consistent.
For gluten-free needs, substitute with a certified gluten-free chocolate sandwich cookie. Check candy melts for allergen labels. If you want a peppermint version, stir in a few drops of peppermint extract into the melted candy, then pipe as usual.
How to Scale the Recipe for Larger Batches
Each batch yields about 30–32 cookies. To make more, double the ingredients but melt and pipe in smaller groups. Large quantities of candy melt harden too quickly when left standing. Work with one bag of melted coating at a time. Keep the rest in a warm bowl until needed.
Prepare all cookies on multiple cooling racks or parchment-lined trays before decorating. This keeps the flow steady and avoids pausing mid-process. Set the completed cookies in a cool room to firm up while the next tray gets decorated. If stacking for storage, use wax paper between layers to prevent smearing.
Scaling this recipe doesn’t add complexity—it just needs organized preparation. Once you create a few batches, the process becomes fast and efficient.
Frequently Asked Questions About Mummy Halloween Oreo Cookies
Can I use white chocolate instead of candy melts?
Yes, but results vary. White chocolate tends to set softer and may melt more easily at room temperature. For best results, use white melting wafers or compound coating designed for decorating.
How long do Mummy Halloween Oreo Cookies stay fresh?
These cookies stay fresh for up to one week if stored in an airtight container at room temperature. Avoid humidity or refrigeration, which can affect the coating texture.
Do I need special tools to make these?
No. A simple resealable plastic bag with the tip cut off works well for piping. A wire rack is helpful but optional.
Can I make these with different flavored Oreos?
Yes. Any Oreo variety works. Just ensure the surface is dry and cool before decorating so the coating adheres properly.
Conclusion
Mummy Halloween Oreo Cookies are one of the easiest themed treats you can prepare with minimal tools and ingredients. No baking. No complicated techniques. Just melt, pipe, and set. Whether you’re making them for a classroom party, Halloween night, or just for fun, they deliver on presentation and taste. Stick to basic steps, stay organized during decorating, and these cookies come together quickly. With room for creative tweaks, this recipe also scales well for large events. Simple ingredients, straightforward process, and kid-friendly results make this a Halloween go-to.