There’s something special about Halloween that goes beyond costumes and candy. It’s in the cozy chaos of kids buzzing with excitement, pumpkins glowing in the window, and the smell of cookies baking in the oven. That’s where these Halloween Chocolate Chip Cookies come in.
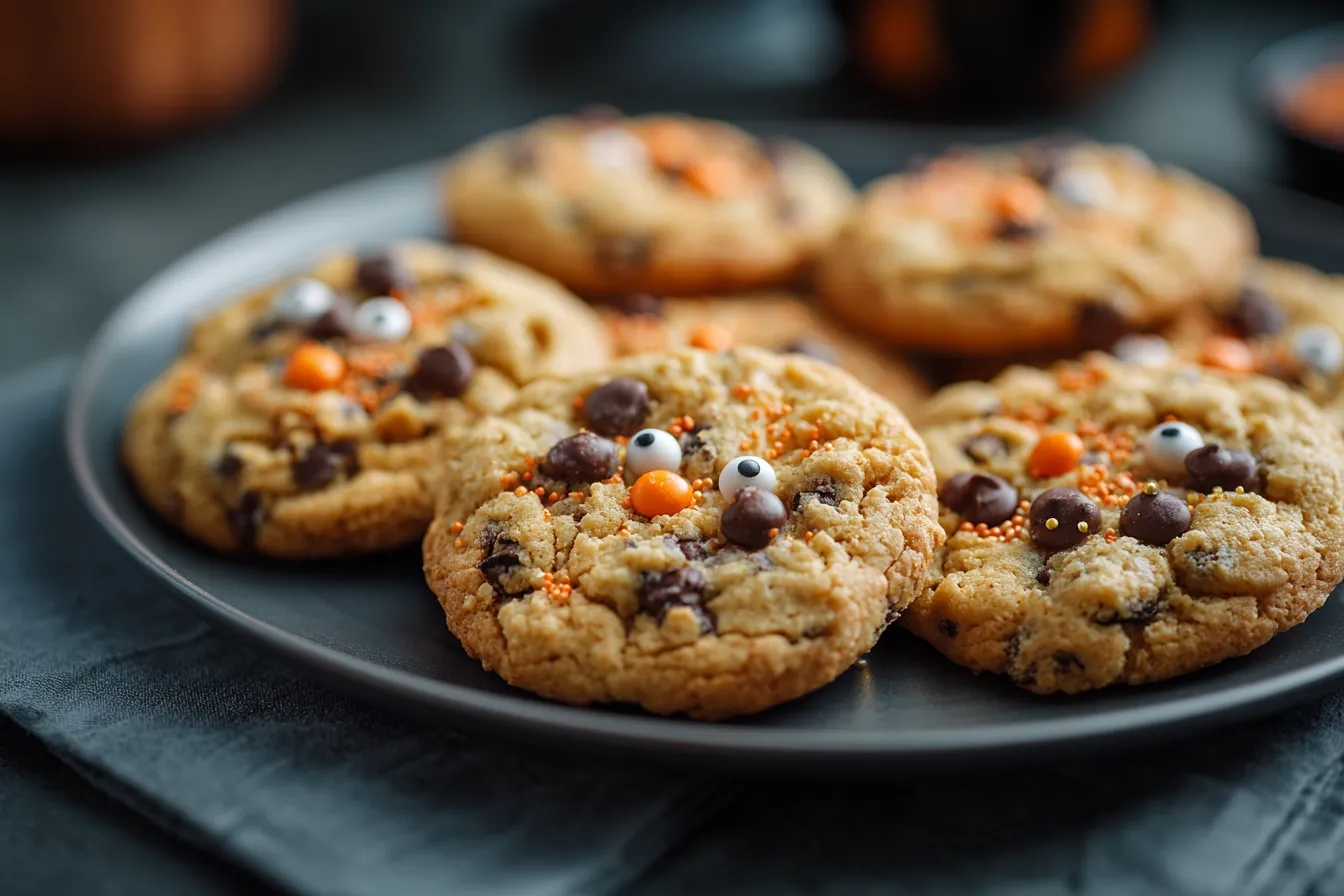
They’re soft, chewy, and packed with chocolate chips—but with a festive twist. Candy eyes, Halloween sprinkles, and just the right touch of spooky fun make them an instant hit for any Halloween celebration. Whether you’re baking with little monsters at home or prepping a party platter, this recipe is as easy as it is delightful.
Let’s step into the kitchen and turn ordinary cookie dough into a Halloween treat everyone will remember.
The Spooky Cookie Tradition
Baking Halloween Chocolate Chip Cookies with My Kids
It all started one October afternoon. Rain was falling just enough to keep us inside, and the costume excitement was already bubbling. My twins had just come back from school with pockets full of plastic spiders and stories about who had the best costume in class. I needed something to keep them busy (and sneak in a little sugar-fueled joy). So, we baked cookies.
Not just any cookies—Halloween Chocolate Chip Cookies. We added candy eyes, tossed in orange and black sprinkles, and laughed as the dough stuck to our fingers. It wasn’t perfect. A few cookies came out lopsided, and one batch had way too many sprinkles. But they were delicious.
That first batch became a tradition. Now, every year before trick-or-treating, we make these spooky cookies together. The candy eyes are always their favorite part. They gently press them in while the cookies are still warm, giggling when a “monster” ends up with four eyes.
It’s simple, it’s fun, and it makes the house smell like butter, sugar, and memories.
Why These Halloween Chocolate Chip Cookies Are So Popular
There are a million cookie recipes out there, but this one stands out. Why? Because it’s designed for real life—messy counters, busy parents, and excited kids.
You don’t need a stand mixer or fancy tools. The ingredients are pantry basics. The dough comes together quickly and chills while you decorate the porch or carve a pumpkin.
The melted butter gives the cookies a soft center and chewy edges. The combination of brown and white sugar adds depth. And the best part? The Halloween toppings. Sprinkles in fall colors, googly candy eyes, even candy corn if you dare. These little details make ordinary cookies feel festive, fun, and just a little spooky.
This recipe is more than a treat. It’s a simple way to turn a holiday into a hands-on experience—one chocolate chip at a time.
Ingredients & Prep
What You’ll Need for the Best Halloween Chocolate Chip Cookies
One of the best things about these Halloween Chocolate Chip Cookies is how approachable the ingredient list is. You probably have most of it in your kitchen already, and the festive add-ins are easy to find in any grocery store during spooky season.
Here’s what you’ll need:
- 1/2 cup unsalted butter (melted) – This gives the cookies that soft, chewy texture right from the first bite.
- 1/3 cup granulated sugar + 1/2 cup light brown sugar – The mix of sugars creates a caramel-like flavor and perfect chew.
- 1 large egg – Binds everything together while adding moisture.
- 1 teaspoon vanilla extract – A little flavor boost that rounds everything out.
- 1/2 teaspoon salt + 1/2 teaspoon baking soda – These control texture, rise, and balance sweetness.
- 1 1/2 cups all-purpose flour – Spoon and level it carefully for accuracy.
- 1 1/2 cups chocolate chips – Use semi-sweet for balance, or go wild with chunks or colored chips.
- 1/2–3/4 cup Halloween sprinkles – Adds color, crunch, and fun.
- Candy eyes (optional, but very fun) – These give your cookies personality and make kids grin every time.
No hard-to-pronounce ingredients. No complicated steps. Just classic cookie components with a festive upgrade.
If you’re doubling the recipe, just multiply everything. The dough freezes well, so you can prep early and bake fresh when it’s time to serve.
Dough Tips for Perfect Cookies
Even simple cookies can go sideways without a few smart steps. Here’s how to keep your Halloween batch on track:
1. Chill the dough
This step matters more than you think. Chilling helps the dough firm up so the cookies don’t spread too much in the oven. Aim for at least 1.5 to 2 hours, but up to 24 hours is even better.
2. Measure the flour properly
Spoon the flour into your measuring cup, then level it off with a knife. Don’t scoop directly from the bag—it packs the flour and leads to dry, dense cookies.
3. Mix gently
Once the dry ingredients go in, don’t overmix. Stop as soon as everything comes together. Overmixing develops gluten, which gives cookies a tough texture. We want soft and chewy, not bready.
4. Fold in the fun
Add your sprinkles and chocolate chips with a spatula or large spoon, gently folding so you don’t crush the mix-ins or overwork the dough.
5. Use a cookie scoop
An ice cream scoop or tablespoon makes portioning a breeze. Even-sized cookies bake evenly and look great together on a tray.
With the prep done right, your cookies will come out picture-perfect every time—spooky eyes and all.
Halloween Chocolate Chip Cookies
Ingredients
- 1/2 cup unsalted butter melted 1/3 cup granulated sugar 67 g 1/2 cup packed light brown sugar (100 g) 1 large egg 1 teaspoon vanilla extract 1/2 teaspoon salt 1/2 teaspoon baking soda 1 1/2 cups all-purpose flour spooned and leveled (186g) 1 1/2 cups chocolate chips 1/2-3/4 cup halloween sprinkles candy eyes optional
Instructions
- Add the melted butter, brown sugar, and granulated sugar to bowl and mix until smooth and combined. Mix in the vanilla and egg and continue mixing until combined. Add in the flour, salt, and baking soda and mix on low until it starts to combine. Then turn up the speed and mix another 15-30 seconds until it is smooth, scraping down the sides of the bowl as necessary to make sure everything is incorporated. Try not to over-mix the batter. You want to mix until it is just combined. Then, using a spatula or large spoon gently fold in sprinkles and chocolate chips. Please 2 tablespoon balls of dough on a baking sheet lined with parchment. You don’t have to worry how far apart they are as we are chilling the cookie dough, not baking it at this time. Cover with plastic wrap and place in the fridge for 1.5 to 2 hours, or up to 24 hours. When ready to make, preheat the oven to 350℉. Place the balls of dough on a baking sheet lined with parchment paper or a silicone baking mat, making sure they are about 2 inches apart. Bake for 11-13 minutes until the edges are golden. Once the cookies are done remove from the oven and if using candy eyes, immediately place them onto the cookies while they are still warm from the oven. Let cool and enjoy!
Notes
Baking & Customizing
How to Bake Halloween Chocolate Chip Cookies
Now that your dough is prepped and chilled, it’s time to bring these Halloween Chocolate Chip Cookies to life—literally, if you’re adding candy eyes.
Here’s how to bake them perfectly every time:
1. Preheat the oven
Set your oven to 350℉ (175℃). Line a baking sheet with parchment paper or a silicone baking mat for easy cleanup and even baking.
2. Scoop and space the dough
Using a cookie scoop or two tablespoons, form dough balls and place them on the baking sheet about 2 inches apart. This gives them space to spread just enough.
3. Bake
Bake the cookies for 11 to 13 minutes, or until the edges are golden brown and the centers look just set. Don’t wait for them to turn completely golden in the middle—they’ll finish baking on the tray as they cool.
4. Add candy eyes
As soon as they come out of the oven, gently press candy eyes into the tops while the cookies are still warm and soft. This step is both fun and essential—it makes each cookie look like a little Halloween monster.
5. Cool
Let the cookies cool on the baking sheet for 5 minutes before transferring to a wire rack. This keeps the centers soft and the edges chewy.
That’s it—spooky, sweet, and ready in under 15 minutes of bake time.
Fun Variations to Try
Want to take your Halloween cookie game to the next level? These variations add a creative twist without complicating the process:
1. Candy Corn Add-In
Fold in a few pieces of candy corn after baking. If you bake them into the dough, they’ll melt and spread. Instead, press them on top while warm for colorful flair.
2. Spiderweb Cookies
After baking, drizzle melted chocolate over the cookies in a spiral. Use a toothpick to drag lines outward, creating a spiderweb effect.
3. Monster Cookies
Add green or purple food coloring to the dough for creepy monster vibes. Press in M&Ms and candy eyes before baking.
4. Gluten-Free Version
Use a 1:1 gluten-free flour blend. No other changes needed. Just be sure to chill the dough so the cookies don’t spread too much.
5. Dairy-Free Option
Substitute vegan butter and use dairy-free chocolate chips. The rest of the ingredients stay the same—and the cookies are still chewy and delicious.
Whether you’re baking for a classroom party, Halloween movie night, or just to surprise your little ghouls, these cookies are guaranteed to disappear fast.
Storage & Make-Ahead Tips
Can You Freeze Halloween Cookies? Yes!
One of the best things about this Halloween Chocolate Chip Cookies recipe is how well it fits into busy schedules. You can prep ahead, freeze extras, or bake in batches without any compromise in flavor or texture.
Here’s how to freeze like a pro:
1. Freeze the Dough
Scoop the dough into balls, place them on a tray lined with parchment, and freeze until solid (about 30 minutes). Once frozen, transfer them to a freezer bag or container. Label with the date. When ready to bake, there’s no need to thaw—just add a minute or two to your bake time.
2. Freeze Baked Cookies
Let baked cookies cool completely, then store them in an airtight container or freezer bag. When you want a fresh treat, reheat them in the oven at 300℉ for 5–7 minutes, or microwave in 10-second intervals until warm.
3. Room Temperature Storage
Keep the cookies in an airtight container at room temperature for 3 to 5 days. Place a piece of bread inside the container to help keep them soft.
4. Refrigerator Storage
You can also keep the dough in the fridge (covered) for up to 24 hours before baking. This is great if you want to break up the baking over two days.
Freezing and storing these cookies makes them a flexible option for parties, lunchbox surprises, or anytime sweet cravings.
How to Turn These into Party Favors or Gifts
Halloween treats don’t have to be candy from the store. These cookies make adorable party favors or homemade gifts with just a little extra packaging flair.
Here’s how to gift them right:
- Use clear cellophane bags tied with black or orange ribbon. Add a small tag that says “Baked with Boos!” or “Fresh from the Monster’s Kitchen.”
- Stack 3–4 cookies in mini boxes or mason jars for easy classroom handouts.
- Add them to a dessert board with marshmallow ghosts, Halloween popcorn, and mini cupcakes. They bring texture, color, and instant kid appeal.
- Nut-free note: If you’re sharing in a classroom or allergy-aware setting, double-check your sprinkles and chocolate chips to ensure they’re processed in nut-free facilities.
These spooky sweets are way more personal than store-bought candy and just as fun to share.
Frequently Asked Questions
Can I skip chilling the dough?
It’s not recommended. Chilling helps control spreading and improves texture. Skipping this step may result in flat, greasy cookies that bake unevenly.
Why do my cookies come out flat?
This usually happens from warm dough, too much butter, or improperly measured flour. Always chill the dough and spoon-fluff-level your flour to get thick, chewy cookies.
Can I make the dough ahead of time?
Yes! You can chill the dough for up to 24 hours or freeze it in dough balls for up to 2 months. Bake directly from frozen by adding a minute or two to the bake time.
What’s the best way to store Halloween cookies?
Store baked cookies in an airtight container at room temperature for 3–5 days, or freeze them for up to 3 months. Add a slice of bread to the container to help keep them soft.
Conclusion
These Halloween Chocolate Chip Cookies bring spooky fun to your kitchen in the most delicious way. With their soft centers, crispy edges, and playful decorations, they’re a festive favorite your family will ask for every October. The dough is simple, the ingredients are easy, and the results? Sweet, chocolatey magic. Whether you’re handing them out at parties, packing them for school, or sneaking one with your coffee, these cookies deliver. Make them once, and you’ll be hooked.