INTRODUCTION
Garlic bread rolls are the kind of comfort food that doesn’t just fill your belly—it fills your home with that unmistakable, buttery aroma of fresh-baked warmth. In today’s recipe, we’re diving into the magic of making garlic bread rolls from scratch. They’re soft, fluffy, and brushed with a golden garlic butter finish that’s impossible to resist. Whether you’re planning a cozy dinner or need a crowd-pleaser for a gathering, these rolls have you covered. We’ll walk through every step, from mixing to baking, with tips to make sure they turn out perfect—even if it’s your first time working with yeast.
Garlic Bread Rolls & A Family Memory
A Warm Kitchen and the Smell of Garlic
Years ago, a late fall evening pushed me to learn how to make real bread—not the store-bought kind. I remember wrapping my sweater tight while my twins napped, and I stood by the oven, watching dough slowly rise on the counter. I had no formal training. Just a craving for something soft, buttery, and warm. I didn’t know then, but those first attempts became a tradition.
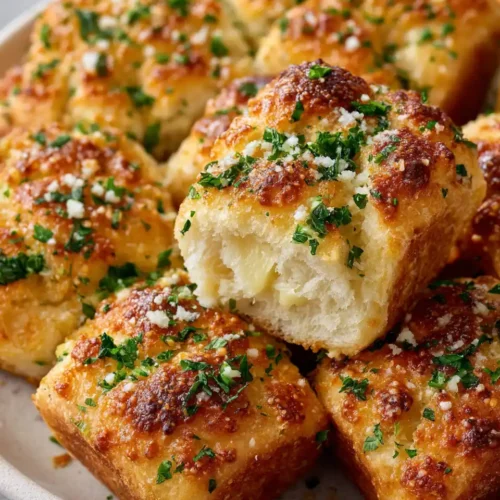
Garlic bread rolls were one of the first recipes I nailed. Not because they were perfect, but because they brought smiles. The kind of recipe that disappears before dinner hits the table. The rolls are brushed twice with garlic butter—once before baking for shine, and once afterward for a punch of flavor. That second brush? It’s the trick that makes people close their eyes with the first bite.
These garlic bread rolls are more than a side. They’re that little extra on the plate that says, someone made this with love. And that’s the beauty of them—you don’t need to be a professional to make something that feels special.
What Makes These Garlic Bread Rolls So Special
Let’s talk texture. These rolls are soft and slightly chewy, thanks to warm milk, egg, and proper kneading. The garlic butter infuses flavor into every bite, not just the top. And the finishing sprinkle of flaky sea salt? Optional—but highly recommended.
Unlike some garlic breads that can be too crusty or greasy, these rolls strike the perfect balance. Pillowy inside, golden outside, and soaked in real flavor.
Once you master these garlic bread rolls, you’ll find reasons to make them often. Soup night, pasta dinners, holiday meals—they fit into every occasion and elevate even the simplest spread.
Garlic Bread Rolls
Equipment
- 9×13 baking pan
Ingredients
- 4 1/2 tablespoons unsalted butter
- 2 tablespoons minced garlic
- 3 1/2 cups + 1 tablespoon all-purpose flour *See notes below for measuring*
- 3 tablespoons chopped fresh parsley
- 1 tablespoon granulated sugar
- 2 1/4 teaspoons instant yeast
- 1 teaspoon fine sea salt
- 1 cup whole or 2% milk warmed to 110°F
- 1 large egg room temperature
- 1 beaten egg for brushing the tops
- For the Garlic Butter
- 2 tablespoons unsalted butter
- 1 tablespoon minced garlic
- 1 tablespoon chopped fresh parsley
- flaky sea salt for finishing
Instructions
- Lightly butter the bottom and sides of a 9×13 pan and set it aside.
- In a small pot, melt the butter and add the minced garlic. Cook for 1-2 minutes or until the garlic is fragrant. Take off the heat and cool while you measure the other ingredients.
- In a stand mixing bowl, combine the flour, parsley, sugar, yeast, and salt. Then add the warmed milk, egg, and garlic butter from above. Knead on low speed with the dough hook until the dough looks smooth and feels soft and tacky, about 10-12 minutes. *If the dough is too sticky, add one tablespoon of flour at a time until you have a workable dough.
- Cut the kneaded dough into 12 equal portions (use a scale for accuracy- 67 grams each). Shape each piece of dough into a smooth ball with your hand. Pinch the bottom of the roll where the seam comes together to keep it tight. Then place the shaped dough balls into the prepared baking pan. Cover the top with plastic wrap or a clean kitchen towel and set them in a warm place to rise until doubled in size, about 1-2 hours. *Watch the video below for visual aid!
- Preheat the oven to 350 F/180 C.
- Brush the tops of the rolls with the beaten egg wash. Then bake the dinner rolls for 20-30 minutes, or until the tops are golden brown.
- While the rolls are baking, make the garlic butter. Melt the butter in a pot and add the minced garlic. Cook for 1-2 minutes until the garlic is fragrant. Then remove it from the heat and stir in the parsley. When the rolls come out of the oven, immediately brush them with the garlic butter. Sprinkle with flaky sea salt if desired, and serve warm!
Notes
Note on yeast: If you use active dry yeast instead of instant yeast, you must activate it first. Stir the yeast into the warm milk and a sprinkle of the sugar. Let it sit for 5 minutes. It should look nice and foamy! Then, after the dough is kneaded, let the dough rise until doubled in size before shaping (roughly 30-60 minutes).
Storage: Dinner rolls are best served the day they are made, but can be stored for 2-3 days in an airtight container or ziplock bag at room temperature.
Freezer: After baking, remove the rolls from the pan and let them cool completely. Transfer them to an airtight container for one month.
Make ahead: Once the rolls are shaped and snuggled into their baking pan, cover the top tightly with plastic wrap and refrigerate overnight. The next day, let them double in size at room temperature before baking. This could take a few hours!
Reheating: These garlic bread rolls are best served warm! Before serving, cover the rolls with foil and bake them at 350°F until warmed through. You can also pop them in the microwave for 20-30 seconds until warm!
Ingredients, Dough Prep & Rising Tips
Gathering the Right Ingredients for Garlic Bread Rolls
Before you dive into baking, line up your ingredients. Freshness makes all the difference—especially when it comes to herbs, garlic, and dairy. This recipe uses whole or 2% milk, which helps give the bread its soft, tender texture. Don’t substitute with water or plant-based alternatives unless you’re comfortable tweaking the method.
Here’s what you’ll need:
- All-purpose flour: Be sure to measure it correctly—spoon it into the cup, then level it off. Better yet, use a scale.
- Instant yeast: No proofing needed. If you only have active dry yeast, you can still use it—just dissolve it in warm milk with a bit of sugar and wait for it to get foamy (about 5 minutes).
- Milk: Warmed to 110°F—not hot. Hot milk can kill the yeast.
- Unsalted butter: Used in both the dough and the garlic butter topping. Melted with garlic, it infuses flavor all the way through.
- Minced garlic: Fresh is best. You’ll use it both inside the dough and for brushing afterward.
- Fresh parsley: Adds color and herbaceous lift to balance the richness.
- Eggs: One in the dough adds tenderness, and one is for brushing the tops before baking for that glossy finish.
Each ingredient has a purpose—and they all work together to create garlic bread rolls that are soft, golden, and flavorful.
Pro Tips for Mixing, Kneading, and Rising Dough
Once your ingredients are prepped, it’s time to bring the dough together. If you’ve got a stand mixer, use the dough hook. You’ll start by melting butter and garlic in a small pot—cook just until fragrant. Then let it cool briefly so it doesn’t scramble your egg or harm your yeast.
Mix the flour, parsley, sugar, yeast, and salt in the bowl. Add the warm milk, egg, and cooled garlic butter. Knead the dough until it’s smooth, soft, and slightly tacky. This usually takes about 10–12 minutes on low speed. If it feels sticky, add flour a tablespoon at a time—but don’t go overboard. Too much flour makes tough rolls.
Now for the rise: shape the dough into a ball and cover it. It should double in size in 1–2 hours, depending on the warmth of your kitchen. Patience is key. This rise develops flavor and structure, and it’s non-negotiable for that fluffy, pull-apart texture you’re after.
The smell already starts here—yeast and garlic mingling as the dough slowly puffs up. You’ll know it’s ready when you gently press it and the indentation holds.
Shaping, Baking & Garlic Butter Finish
The Right Way to Shape Soft Rolls
Once your dough has doubled, it’s time to get hands-on. This step is where the rolls start to take shape—literally. Punch down the dough gently to release extra gas, then divide it into 12 equal portions. If you want consistency (and rolls that bake evenly), use a kitchen scale. Each piece should weigh about 67 grams.
To shape each roll, take a dough portion and pull the sides down, tucking them underneath to create a taut, smooth top. Pinch the seam underneath to seal it, then roll gently between your palms to form a ball.
Grease a 9×13 baking pan with butter, then nestle the dough balls inside. They should be spaced slightly apart, but close enough that they’ll touch as they rise. This creates soft edges when they bake up—like classic pull-apart rolls.
Cover the pan with plastic wrap or a clean kitchen towel, and let them rise again until doubled in size, which usually takes 1–2 hours. Don’t rush this part. The second rise gives the rolls their light, fluffy interior.
Bake Time, Brush, and Garlic Butter Magic
When the rolls look full and puffy, preheat your oven to 350°F (180°C). Gently brush the tops with a beaten egg—this gives the rolls that shiny, golden finish we all love.
Bake for 20–30 minutes, rotating the pan halfway through for even browning. Keep an eye on them: the tops should be a deep golden color, but not too dark. If they brown too quickly, tent with foil for the last few minutes.
Now comes the best part—the final brush. While the rolls bake, melt more butter and garlic in a pot. Once fragrant, remove from heat and stir in fresh parsley. As soon as the rolls come out of the oven, brush them generously with this garlic butter. Don’t hold back—let it soak into the tops, down the sides, and even into the cracks.
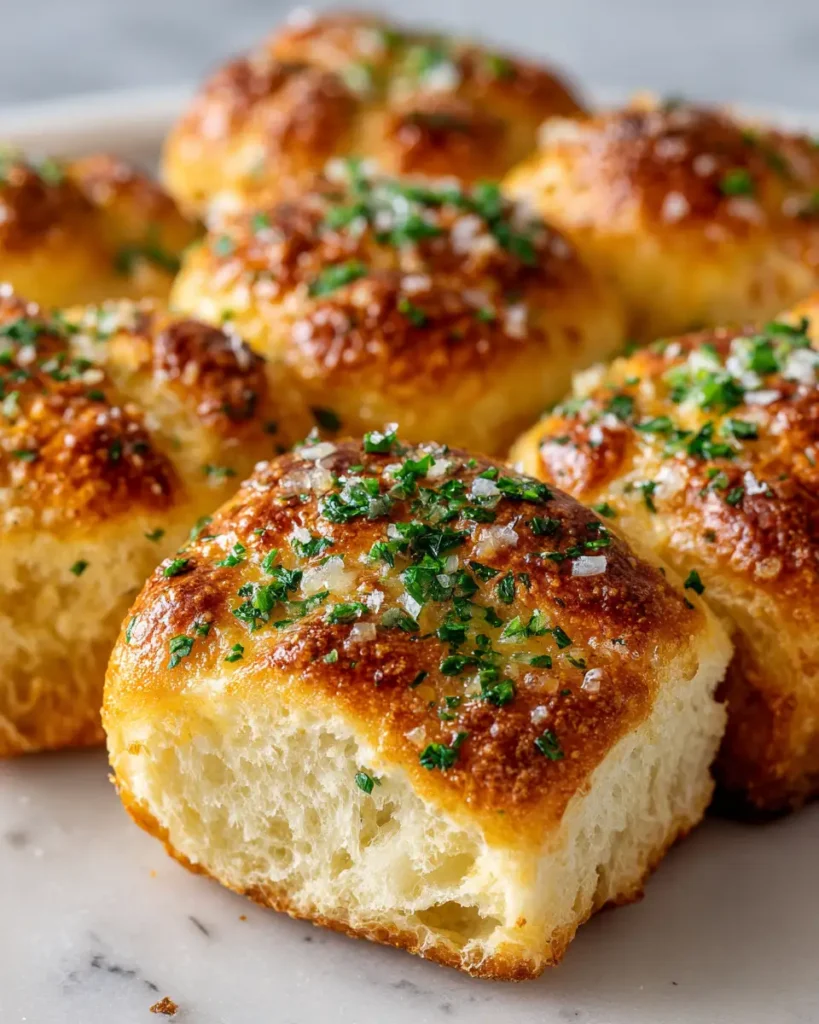
Optional: Sprinkle with flaky sea salt for an extra touch. Serve them warm, fresh from the pan, and watch how fast they disappear.
These garlic bread rolls hit every note—soft, rich, buttery, and bursting with flavor. And if you’re like me, you’ll find yourself sneaking one before dinner’s even served.
Storage, Reheating & Make-Ahead Ideas
How to Store Garlic Bread Rolls Without Losing Softness
Garlic bread rolls taste best straight from the oven—but don’t worry, they can still be delicious a few days later with proper storage. Once the rolls have completely cooled, place them in an airtight container or a ziplock bag. Keep them at room temperature for up to 3 days. Don’t refrigerate—cold air dries them out faster than you’d think.
If you want to keep them longer, freezing is your best bet. After baking, let the rolls cool entirely, then remove them from the pan. Transfer to a freezer-safe container or bag, and they’ll stay fresh for about 1 month. When you’re ready to eat, simply reheat and brush with a little extra garlic butter if desired.
Garlic bread rolls are also great for lunchboxes, soup nights, or cozy leftovers. Just store them right, and that soft, buttery texture sticks around.
Freezing, Reheating, and Make-Ahead Strategies That Work
To reheat rolls without drying them out, cover them with foil and place in a 350°F oven for about 10–12 minutes until warm. You can also microwave them for 20–30 seconds per roll—but be careful not to overheat or they’ll turn chewy. If you’ve stored them in the freezer, let them thaw at room temperature first for the best texture.
Want to make them ahead of time? No problem. Once your rolls are shaped and placed in the baking pan, cover the pan tightly with plastic wrap and refrigerate them overnight. The next day, pull them out and let them rise at room temperature until doubled in size before baking. This could take a few hours, so plan accordingly.
These garlic bread rolls adapt to your schedule and still taste like you baked them fresh. With a little planning, you can have homemade rolls ready anytime—no stress, just buttery bliss.
FAQ Section: Your Garlic Bread Rolls Questions Answered
How do I make garlic bread rolls soft and fluffy?
The key to soft and fluffy garlic bread rolls lies in proper kneading and rising. Knead the dough until it’s smooth and tacky—this develops the gluten that gives rolls structure and softness. Also, allow enough rising time; the dough should double in size both before and after shaping. Using warm milk and a whole egg in the dough also helps enrich the texture, making the rolls pillowy and tender.
Can I use active dry yeast instead of instant yeast?
Yes, you can substitute active dry yeast for instant yeast, but it needs to be activated first. Stir it into the warm milk along with a pinch of sugar and let it sit for about 5 minutes until it becomes foamy. Then, proceed with the recipe as written. Remember, your rise times may be slightly longer, so watch the dough, not the clock.
What’s the best way to reheat garlic bread rolls?
For the best texture, reheat the rolls in a 350°F oven, covered with foil to prevent them from drying out. About 10–12 minutes is usually enough. For a quick fix, you can microwave individual rolls for 20–30 seconds, but avoid overheating, which can make them rubbery. Brushing on extra garlic butter after reheating gives them that fresh-out-of-the-oven flavor.
Can I make garlic bread rolls ahead of time?
Absolutely. Shape the rolls and place them in the pan, then cover tightly with plastic wrap and refrigerate overnight. The next day, let them rise at room temperature until doubled in size, then bake as directed. You can also freeze fully baked rolls and reheat them later—just let them cool completely before storing.
Conclusion
Garlic bread rolls are more than just a side—they’re a moment. A moment when someone walks into your kitchen and says, “What smells so good?” A moment when hands reach across the table before the main dish even arrives. A moment that lingers long after the last bite.
You don’t need fancy techniques or a pro kitchen to make these. Just simple ingredients, a bit of time, and a love for cozy, buttery flavor. Whether you’re baking for family, friends, or just yourself on a quiet night, these garlic bread rolls will never disappoint.
Now that you’ve got the method, the tips, and the flavor tricks—go bake something warm and wonderful.