Article Intro :
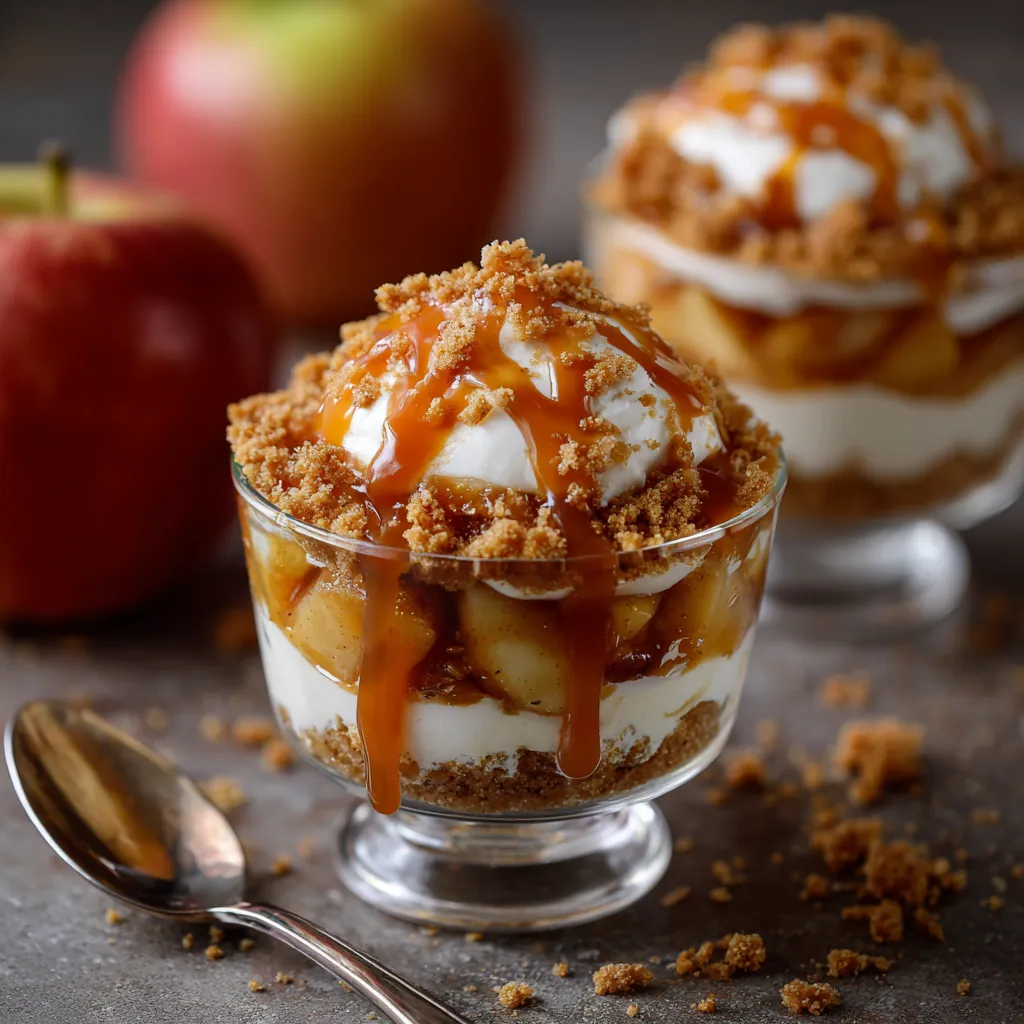
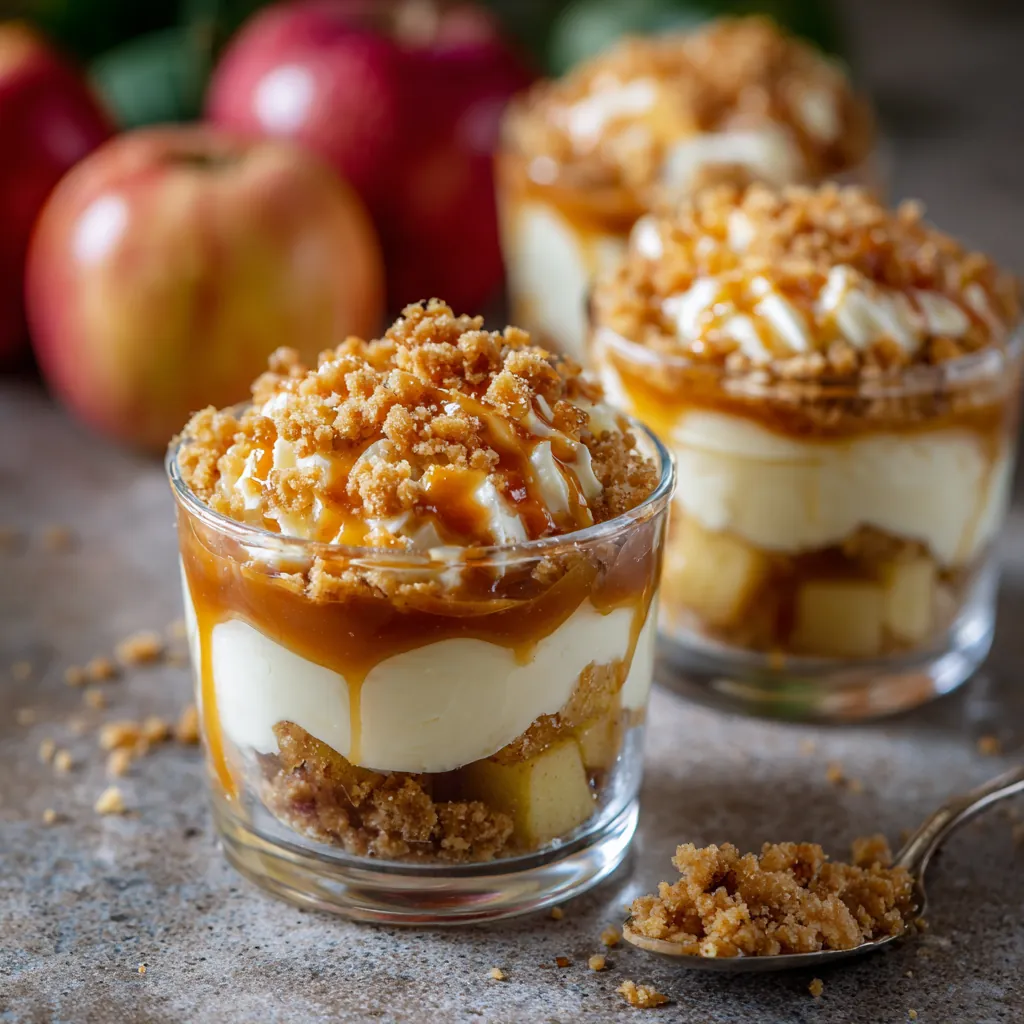
When fall rolls around and crisp apples are everywhere, my kitchen fills with the scent of cinnamon, brown sugar, and caramel. These caramel apple dessert cups aren’t just a treat—they’re a memory. I made these first for a back-to-school potluck when I needed something quick but special. They turned out to be the hit of the evening! They’ve since become my go-to for autumn parties and cozy nights in. No baking, just layers of buttery vanilla wafer crust, creamy caramel mousse, and cinnamon-kissed apples. In this article, you’ll learn how to make these charming cups and why they’re so loved.

Caramel Apple Dessert Cups
Ingredients
- Cinnamon Apples
- ▢4 cups 500 g apples peeled and chopped
- ▢½ cup 110 g light brown sugar
- ▢1 tsp 2 g cinnamon
- Caramel Apple Dessert Cups
- ▢2 cups 220 g vanilla wafer crumbs
- ▢¼ cup 57 g salted or unsalted butter melted
- ▢1 pkg 96 g instant vanilla pudding mix 3.4 ounces
- ▢1 cup 244 g milk
- ▢⅓ cup 75 g salted caramel sauce homemade or store bought
- ▢1 ½ cups 357 g heavy cream
- ▢additional caramel sauce for garnish
Instructions
- In a medium saucepan, combine peeled and chopped apples, brown sugar, and cinnamon. Stir and cook over medium heat until the apples are soft and the liquid thickens. Set aside to cool.
- In a mixing bowl, combine vanilla wafer crumbs and melted butter. Stir until fully incorporated.
- Portion vanilla wafer crumbs into 28 – 2 ounce plastic cups. I recommend using a small cookie scoop. Use the back of one of the plastic cups to press the crumbs down to create the crust.
- In a large mixing bowl, combine instant vanilla pudding mix and milk. Whisk to combine. Chill for 5 minutes.
- Add salted caramel sauce to the vanilla pudding mixture. Use an electric hand mixer on medium speed to mix the caramel into the pudding until smooth.
- Pour in the heavy cream to the pudding mixture and whip then whip with an electric hand mixer for 3-5 minutes until it becomes thick and creamy.
- Transfer the caramel mousse mixture to a large piping bag. Pipe the mousse into the plastic cups on top of the vanilla wafer crust.
- Using a spoon, portion the cinnamon apples over the caramel mousse. Drizzle with additional caramel sauce if desired.
- Seal the cups with a lid and chill. The cups can be served immediately or stored in the refrigerator for 2 to 3 days.
Notes
Caramel Apple Dessert Cups – The Cozy Flavor Combo Everyone Love
Where the Caramel Apple Dessert Cup Story Begins
The classic pairing of tart apples and sweet caramel has been around forever—but turning that combo into a creamy, layered dessert cup? That was a happy accident in my house. I had apples to use up, a box of pudding mix, and some leftover vanilla wafers. With just a bit of creativity, I ended up with these gorgeous no-bake treats that now show up at every gathering. They’re elegant enough for a holiday table but easy enough to prep in under an hour.
These caramel apple dessert cups are ideal for fall, but don’t be surprised if you crave them all year. The layers of flavor and texture—from crunchy crust to velvety mousse to soft cinnamon apples—make every spoonful satisfying. And the presentation in small cups? Always a crowd-pleaser.
Why No-Bake Desserts Are Always a Win
Sometimes, you just don’t want to turn on the oven. Whether it’s the heat of summer or you’re already juggling a stovetop dinner, having a sweet dessert that requires zero baking is a lifesaver. These cups rely on instant pudding and whipped cream for a rich, mousse-like texture—no oven, no fuss. You can even prep them a day ahead, which makes entertaining a breeze.
Plus, cleanup is minimal. No springform pans or sticky caramel pots—just a few mixing bowls, some plastic dessert cups, and you’re set. This recipe proves that delicious doesn’t have to mean complicated.
Breaking Down the Layers of Caramel Apple Dessert Cups
The Vanilla Wafer Crust: Buttery and Crisp
The foundation of these caramel apple dessert cups is the simplest part—but don’t underestimate it. Vanilla wafer crumbs mixed with melted butter create a crust that’s lightly sweet, buttery, and just firm enough to hold its own under the mousse. Pressed gently into the bottom of each plastic dessert cup, this layer gives you that little crunch that balances all the creamy textures above.
You can use a cookie scoop to portion out the crust, then press it down with the back of another cup. It’s quick, clean, and keeps each portion consistent. And if you want to get fancy, graham crackers or ginger snaps work too—but honestly, vanilla wafers bring that nostalgic flavor that just fits.
Caramel Mousse Filling: Light, Rich, and Fluffy
This might be my favorite part. The mousse is where all the flavors come together—vanilla pudding, salted caramel sauce, and heavy cream. After just a few minutes of whipping with an electric mixer, it turns into a silky, cloud-like mousse that holds its shape beautifully in the cups.
Here’s what makes it work: the pudding adds body, the caramel brings deep sweetness with a hint of salt, and the heavy cream lifts everything into something spoonable and luxurious. It’s not too sweet, but it’s indulgent in all the right ways.
Pipe it into your cups right on top of the crust layer, and suddenly you’ve got a dessert that looks bakery-level—but was built right in your own kitchen.
Warm Cinnamon Apples and That Final Caramel Drizzle
The Apple Topping: Sweet, Spiced, and Soft
No caramel apple dessert cup would be complete without the apples. And these aren’t just diced and dumped—they’re cooked gently with brown sugar and cinnamon until tender and syrupy. It’s like apple pie filling, but easier and faster.
The key here is to peel and chop the apples into small, even pieces so they cook uniformly. I use a medium saucepan over gentle heat to avoid overcooking. Within about 10 minutes, the apples soften, and the juices thicken into a glossy, cinnamon-scented sauce. Once cooled, these spoonfuls of cozy flavor nestle perfectly over the creamy caramel mousse layer.
Want to switch things up? Try using a mix of tart Granny Smith and sweet Honeycrisp apples for a balanced flavor.
Garnish Game: Simple Yet Elegant
Topping these dessert cups is where you can get a little artistic. Once the apples are on, take a spoon and drizzle a bit more caramel sauce right over the top. This final touch not only looks beautiful—it also hints at what’s inside.
If you’re prepping for a party, you can seal each cup with a lid and chill until serving. They’ll stay perfect for up to three days in the fridge. Or if you’re making these just for your own family like I often do, you can serve them right away for a warm-cold contrast that’s incredibly satisfying.
Some folks sprinkle a little crushed cookie on top for texture, or even a tiny pinch of sea salt to highlight the sweetness. Either way, that golden drizzle on top makes them look polished without extra work.
Serving Tips, Storage, and Customization Ideas
Make-Ahead and Storage Tips That Actually Work
One of the biggest perks of these caramel apple dessert cups is how well they hold up in the fridge. Once assembled, you can store them in individual plastic dessert cups with lids and chill for up to three days. The layers stay distinct, the mousse keeps its texture, and the flavors deepen beautifully.
That makes them ideal for holidays, potlucks, and even lunchbox treats. I’ve made them a full day before a gathering, and they still tasted freshly made. Just make sure the apples are fully cooled before adding them to prevent melting the mousse.
Want to make them even faster the day-of? Prepare the crust, mousse, and apples in advance and keep them separate. Then just assemble when you’re ready to serve.
Easy Customizations for Year-Round Use
While fall is the obvious season for caramel apple dessert cups, don’t let that limit you. This recipe is incredibly flexible. You can try spiced pears in winter, fresh peaches in summer, or even roasted berries for spring.
Want to go full indulgence? Add a dollop of whipped cream on top, or sprinkle with crushed pretzels for a salty crunch. Chocolate lovers can swap the vanilla pudding with white chocolate or butterscotch and use chocolate cookie crumbs instead of wafers.
For a more elegant twist, layer everything in small glass jars or mini trifle bowls. The see-through sides show off the beautiful layers and make them feel a bit more upscale—even though they’re still just as easy.
Whatever version you choose, these cups are proof that great desserts don’t need to be complicated. They just need flavor, texture, and a little love.
Frequently Asked Questions
1. Can you make caramel apple dessert cups ahead of time?
Yes, you can make these up to 3 days in advance. Simply assemble the layers, seal each cup with a lid, and store them in the refrigerator. They hold up beautifully and are perfect for parties or meal prep.
2. What kind of apples work best for this dessert?
Tart varieties like Granny Smith provide a nice contrast to the sweet caramel mousse, but sweeter apples like Honeycrisp or Fuji work well too. A mix of tart and sweet apples often gives the best flavor balance.
3. Can I use whipped topping instead of heavy cream?
Yes, you can substitute whipped topping (like Cool Whip) if you’re short on time. However, whipping real cream gives a richer texture and more stable mousse. For best results, stick with heavy cream if possible.
4. How do I keep the crust from getting soggy?
Since these are no-bake, the crust stays fairly firm, especially when chilled. To prevent sogginess, let the apple mixture cool completely before layering, and don’t assemble more than 2–3 days ahead.