Intro
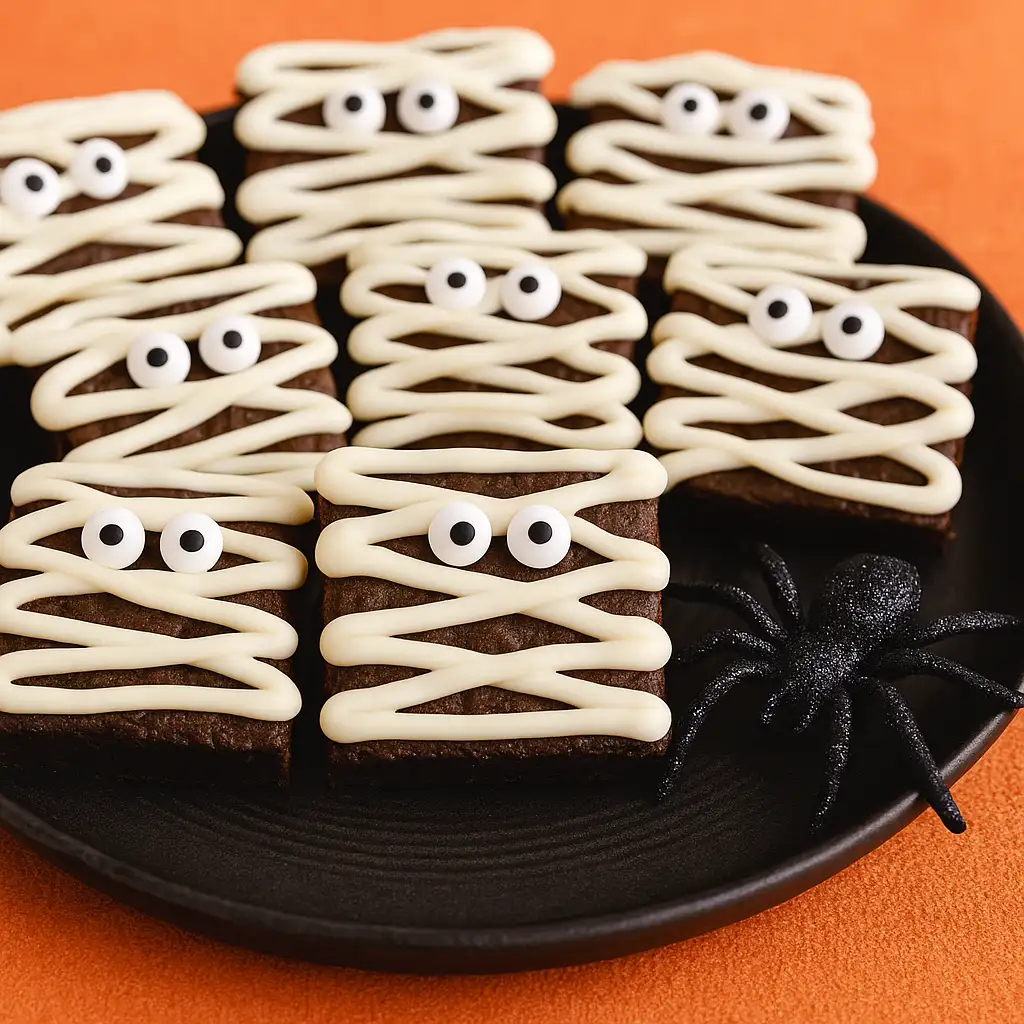
Halloween baking always brings out the playful side of dessert. There’s something special about transforming a classic into a festive treat that feels both spooky and sweet. That’s exactly what makes mummy brownies such a hit. They’re rich, chocolatey squares dressed up with white chocolate bandages and candy eyes, making them look like adorable little mummies ready for the party table. Whether you’re baking for kids, a costume party, or just a cozy night in with scary movies, these brownies add the perfect touch of fun. With simple steps and easy ingredients, mummy brownies are a guaranteed crowd-pleaser.
The Story Behind Mummy Brownies
There’s something magical about taking an everyday dessert and giving it a playful twist. Mummy brownies prove that fun presentation doesn’t have to be complicated. The first time I made them was on a chilly October afternoon when the leaves were swirling outside. My twins had come home from school with wide eyes, begging for something “spooky but yummy.” I wanted a dessert that felt festive without requiring hours of decorating, and mummy brownies became the answer.
At their core, mummy brownies are everything you love about homemade brownies: fudgy, chewy, and perfectly balanced between sweetness and deep cocoa flavor. The secret lies in simple ingredients you probably already have—flour, cocoa, butter, eggs, and a touch of vanilla. Once baked and cooled, the fun begins. White chocolate melts into silky ribbons that crisscross each square, creating the look of bandages. Add a pair of candy eyes on top, and suddenly an ordinary brownie transforms into a little character ready to join your Halloween spread.
These mummy brownies also make baking a family activity. Kids love placing the eyes and drizzling the chocolate, often giggling as their “mummies” turn out slightly crooked or silly-looking. That’s the charm—each one has its own personality. And unlike store-bought themed treats, these are homemade with love and just the right amount of sweetness.
What I love most is their versatility. You can serve them at a classroom party, wrap them individually for trick-or-treat bags, or simply plate them after dinner when the family is ready for a cozy movie night. They’re festive without being fussy, and that makes mummy brownies a Halloween tradition worth keeping year after year.
How to Make Mummy Brownies at Home
Making mummy brownies doesn’t require fancy skills or equipment, which is why they’ve become such a favorite in my kitchen. The process starts with a quick melt of butter and semisweet chocolate chips in the microwave. Thirty seconds is usually enough to soften the mixture, and another thirty seconds finishes the job. Stirring until smooth creates the base for that deep, chocolatey flavor.
Next comes the dry blend. In a smaller bowl, whisk together flour, cocoa powder, brown sugar, white sugar, and a pinch of salt. This combination guarantees a balance of sweetness with that rich, fudgy bite every brownie lover craves. Once mixed, add the eggs and vanilla extract to the melted butter and chocolate, stirring until everything is glossy and smooth. At this stage, the kitchen already smells like a promise of chocolate magic.
When wet and dry ingredients come together, the batter thickens into something irresistible. Spread it evenly into a parchment-lined pan to keep cleanup easy, and bake at 350°F for about 30–35 minutes. A toothpick test in the center will tell you when they’re ready—slightly gooey but not wet.
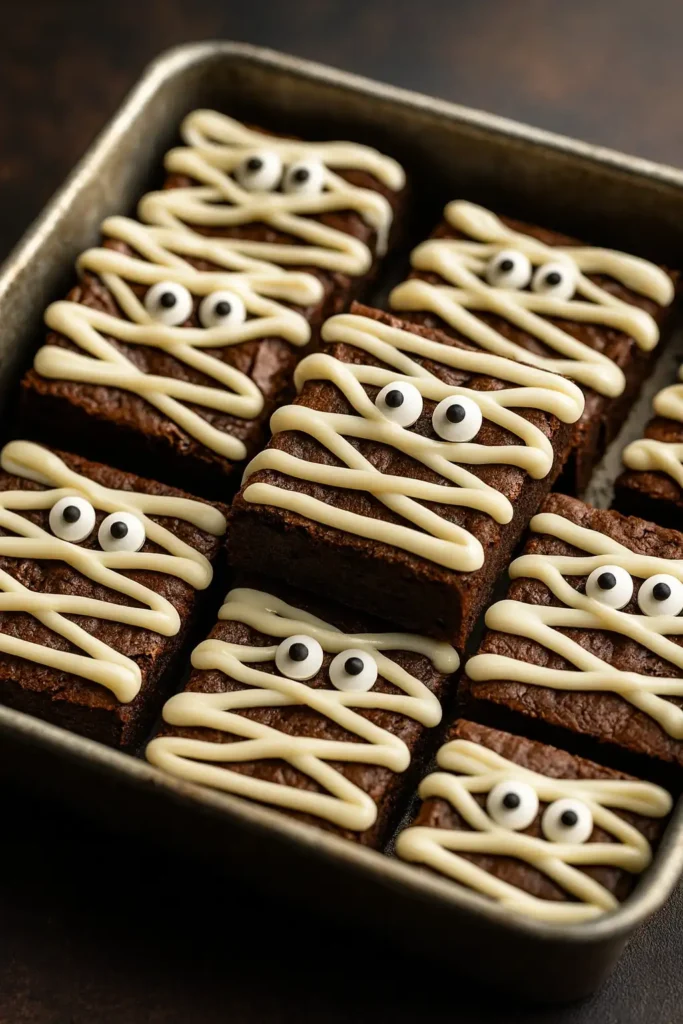
The decoration is where mummy brownies come alive. Once cooled and sliced into squares, melt white chocolate chips until silky. Transfer the chocolate into a small zip-top bag, snip a corner, and drizzle in thin lines across each brownie. Start at the top and work your way down, overlapping the drizzle to mimic the look of mummy bandages. Gently press two candy eyes into place, making sure the chocolate secures them.
After a short cooling period, you’ll have brownies that look as good as they taste. Every bite offers a fudgy center wrapped in playful Halloween style. It’s a dessert that combines creativity with comfort, and that’s what makes mummy brownies unforgettable.

Mummy Brownies
Ingredients
- ½ Cup Butter
- ¼ Cup Chocolate Chips – Semisweet
- 2 teaspoons Vanilla Extract
- 2 eggs – large
- ¾ Cup Flour – 94g
- ½ Cup Sugar – 100g
- ½ Cup Brown Sugar – 100g
- ⅓ Cup Dutch Process Cocoa – 33g
- ¼ teaspoon Salt
- Toppings
- 32 Candy Eyes
- 1 cup White Chocolate Chips – or Candy Wafers
Instructions
- In a large mixing bowl melt butter and chocolate chips in microwave for 30 seconds. Stir and melt for 30 seconds more. Stir until butter is fully melted
- In a smaller bowl combine flour, brown sugar, white sugar, cocoa powder and salt. Mix to combine.
- Mix eggs and vanilla to butter and chocolate mixture until thoroughly combined.
- Hand stir dry ingredients into wet ingredients until fully combined.
- Bake in a 9x9in baking pan lined with parchment paper or spray with cooking spray
- Bake at 350F Degrees for 30-35 minutes or until toothpick in center comes out clean
- Allow to cool in pan for 5 mins before lifting brownies out using parchment paper and allow to fully cool for 30 minutes before slicing.
- Slice cooled brownies into 16 pieces. 4 rows by 4 rows and place on cooling rack
- In a small bowl melt white chocolate chips in microwave in 30 second intervals stirring in between until smooth. Do not over cook or chocolate will burn.
- Place melted chocolate into a sandwich zip-loc bag and snip a small piece off the corner to drizzle chocolate
- Place 2 eyeballs on each brownie piece
- Drizzle chocolate starting at the top of the brownie across to the other side and then back making sure to touch chocolate with eyes to help secure in place and continue below eyes making sure to touch chocolate on eyes.
- Repeat the back and forth drizzle down the brownie to create a mummy look.
- Allow chocolate to cool for 10-15 minutes before storing brownies.
Notes
Milk Chocolate Chips for Semisweet Chocolate Chips
Baking Cocoa Powder for Dutch Process Cocoa
Adding an extra egg will result in cake-like brownies Nutrition Disclaimer
All nutrition values are approximate and calculated by a plugin and are provided as a courtesy. Adding or subtracting ingredients will change the nutritional value. Nutrition
Calories: 150kcal | Carbohydrates: 21g | Protein: 2g | Fat: 7g | Saturated Fat: 4g | Polyunsaturated Fat: 1g | Monounsaturated Fat: 2g | Trans Fat: 1g | Cholesterol: 36mg | Sodium: 99mg | Potassium: 53mg | Fiber: 1g | Sugar: 15g | Vitamin A: 213IU | Vitamin C: 1mg | Calcium: 17mg | Iron: 1mg
Creative Serving Ideas and Fun Variations (300 words)
One of the best things about mummy brownies is how easily they fit into different celebrations. While they’re a Halloween favorite, they can also shine in other settings with a little creativity. Serve them on a platter for a party, each one decorated with slightly different “bandages” to keep the look playful. Kids especially love comparing their mummies to see which one looks the spookiest or the funniest. If you’re hosting adults, pair mummy brownies with hot coffee or spiced cider to balance the sweetness with something warm and cozy.
For classroom or office treats, wrap each brownie in a clear bag and tie it with an orange or black ribbon. Not only does this keep them fresh, but it also makes them easy to grab and go. They’re small enough to pack into lunchboxes, yet special enough to feel like a festive surprise.
Variations are endless, which keeps the recipe exciting year after year. Try swapping semisweet chocolate for milk chocolate chips if you prefer a sweeter base. For a deeper, slightly bitter flavor, stick with Dutch-process cocoa and add a sprinkle of espresso powder to the dry mix. Even the toppings can be adjusted—colored candy melts create vibrant “bandages” if you want to mix things up, and swapping candy eyes for tiny marshmallows can give a fun, makeshift twist.
Texture can also be tailored. Adding an extra egg will produce a cake-like version, while sticking with the original recipe keeps them fudgy. A sprinkle of crushed cookies over the drizzle adds crunch, while a drizzle of peanut butter mixed with white chocolate creates a nutty, mummy-inspired design.
No matter how you serve them, mummy brownies bring smiles to the table. They’re proof that with a few tweaks, a simple brownie recipe can transform into something festive and memorable.
Tips, Storage, and Common Questions
The beauty of mummy brownies is that they look impressive while staying simple. Still, a few tricks can make the process smoother. Always let the brownies cool completely before slicing; warm brownies will crumble and make decorating tricky. Use a sharp knife and wipe it clean between cuts for neat, even squares. When melting white chocolate, stir often and heat in short bursts to prevent burning—smooth chocolate makes the mummy bandages easier to drizzle.
Storage is easy. Keep mummy brownies in an airtight container at room temperature for up to three days. If you need them to last longer, refrigerate them for up to a week or freeze them for a month. When freezing, wrap each brownie in plastic wrap before placing them in a freezer bag. Thaw them at room temperature before serving, and they’ll still taste freshly baked.
Here are answers to some common questions:
Can I make mummy brownies ahead of time?
Yes, bake the brownies a day before, store them covered, and decorate with white chocolate and eyes right before serving.
Do I need candy eyes, or can I substitute?
Candy eyes add fun, but mini chocolate chips or small marshmallows work as substitutes.
What if I don’t have Dutch-process cocoa?
Regular baking cocoa works fine, though it produces a slightly different flavor.
How do I get fudgy brownies instead of cake-like ones?
Stick with two eggs for fudgy brownies. Add an extra egg if you prefer a lighter, cake-like texture.
conclusion
Mummy brownies prove that Halloween baking doesn’t have to be complicated. With simple steps, everyday ingredients, and a little creativity, you can serve a dessert that delights both kids and adults. It’s a treat that brings fun to the table and flavor to every bite.